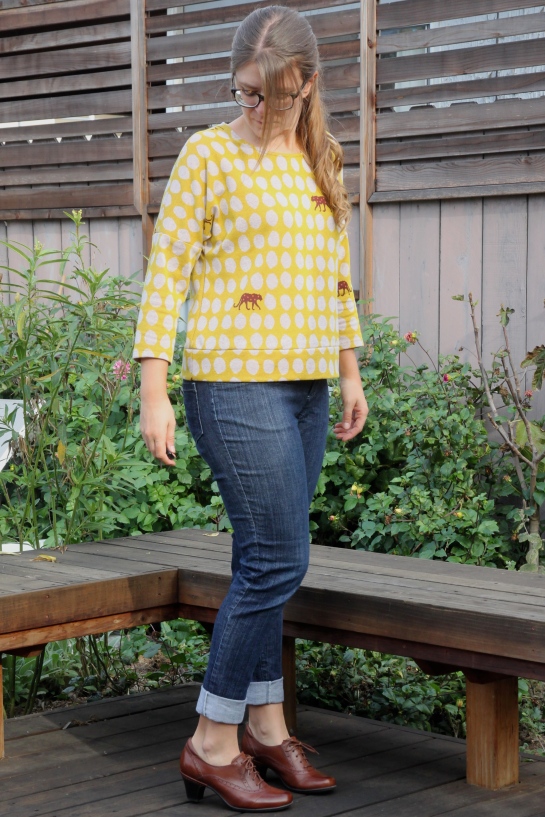
Well hello. Apparently I have a blog. Wouldn’t have known, for all the attention I’ve paid to it lately. No crazy(ier than usual) life stuff, just a matter of wanting recently to spend my free time either sewing or vegging, of which blogging is neither. But. Here it is, fall somehow, so I suppose I should wrap up summer with the pattern I spent the summer making. My 2016 summer pattern obsession: the Hey June Santa Fe top.

I knew instantly when this pattern was released that it was for me. Given last summer’s obsession with the Tessuti Ruby (and that hasn’t gone away either, I also made three more of those this year), a swing top with more options seemed the logical next step. However, I somehow had zero drapey rayon knits in my stash. How that’s even possible I have no idea, but when I went eagerly hunting in the fabric closet for Santa Fe candidates I came up disappointed. So obviously I channeled that disappointment into fabric shopping. I discovered LA Finch Fabrics, which seems to be the internet version of roaming through the LA fashion district. It seemed rather silly to have them do it for me when I could just drive down there and hunt myself, but on the other hand, if they do it for me I don’t have to drive down there and hunt myself. Fun print rayons were soon making their way up the 101 to me, and were washed and turned into tanks immediately.

Some overall notes on the pattern: I made a straight size medium for all versions. Generally I would grade out to a larger size in the waist/hip, but I skipped that because of the swingy shape, so it’s probably less swingy on me than intended. I do love the shape and the length is right – shorter than the Ruby, but it’s wider too so that makes sense. I omitted the front/back seam on all my versions because I thought it was unnecessary and just asking for wavy seam weirdness. I was also able to fit all of the versions onto just a yard of wide knit fabric. And I made all these tops in just a couple hours each from start to finish. So pretty much the perfect summer top. My only quibble is with the binding – specifics below.

flamingo santa fe tankMy first Santa Fe was the cut-in tank with contrast (view D). I happened to have a bit of leftover pink knit from my Pneuma Tank that matched this Finch flamingo print perfectly. I love this top, except that I can’t wear it with my favorite shorts, which are also gray. When that’s the only thing wrong with a top you know you’ve found a winner.

On this version I used the instructed binding method, which I have to say I don’t like very much. It’s the attach-to-wrong-side-flip-to-right-side-around-edge-and-topstitch method, which for some reason I find more fiddly and annoying the the reverse method of turning to the inside and stitching in the ditch. But I vastly prefer bands as a knit finish to either kind of binding anyway – much faster, easier, and any imperfect stitching is less obvious. But for some reason I stuck with the binding.

feather santa fe tankMy next tank was the plain cut-in version (view A), minus center seam. The fabric is a great feather print, but it’s not a high quality rayon and it’s already showing wear. It’s a printed knit, so it shows through white when it’s stretched, which means if you look closely you can see some white in the bindings. (It was after this top that I abandoned the binding method entirely.) Also, after washing a couple times I noticed that the tank has become decidedly asymmetrical. On closer inspection it seems to be terribly off grain, which I suppose is my fault – the fabric must have been off grain but I didn’t notice and folded it as usual. Although on my next two tops, before hemming I laid them out flat and the hem was slightly asymmetrical for some reason, so I trimmed it even and have had no problems, but I’m not sure why that’s happening. I should un-hem the feather tank, trim it, and re-hem, but I haven’t wanted to take the time.

In July, armed with both tanks, I went on a trip to the Bay Area, and managed to fit in a stop at Stonemountain and Daughter in Berkeley on my way home because I badly wanted more drapey fabrics for Santa Fes. I was remarkably restrained in that I only bought two pieces and sewed them both up immediately.
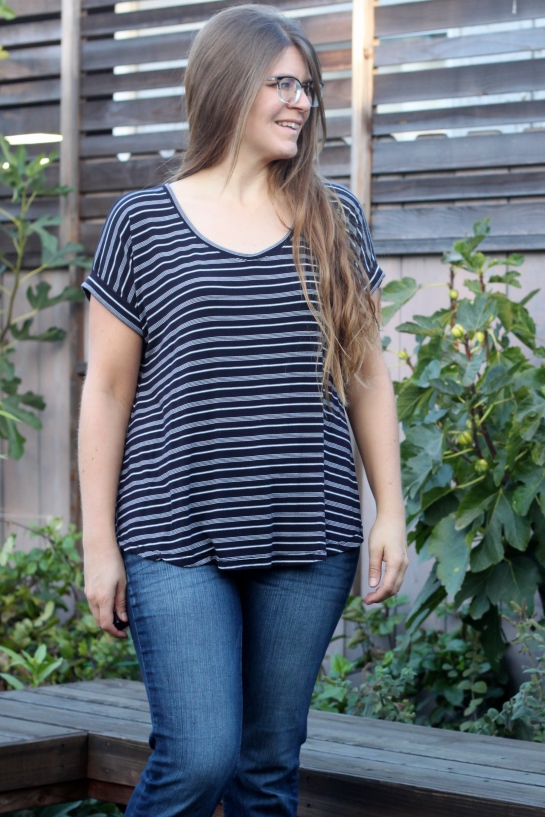
black stripe santa fe teeThe first was this gorgeous black and white stripe rayon that I made into the plain sleeved version (view C), again sans center seam. I loved the testers’ striped versions with the dolman sleeves creating a vertical stripe that gets cut by the horizontal stripe of the cuff, and I had to have that. The cuff is actually a nice design feature that dresses up the top a little, I think. And I decided to finish the neckline of this version with a band rather than a binding. To preserve the intended neckline opening I trimmed the seam allowance off of the neckline, since I would be adding it back with the band, and for the band length I used 80% of the neckline measurement because my knit was incredibly stretchy. It worked out, though I think the neckline is very slightly bigger than I’d like.

contrast stripe santa fe teeAnd for my last version, I thought I’d do some stripe play with this great purple and gray bamboo jersey, so I made view F with the contrast sleeves, cutting the sleeves on the cross grain. This knit is super stretchy in all directions, so I knew it’d work to flip the shoulder pieces (though it was a real brain bender in the moment, and I was barely able to fit it into my yard of fabric). I finished the neckline with a band again, but this time I didn’t trim the neckline first. And because I didn’t want to go overboard with the stripe swapping, I omitted the cuff and just hemmed the sleeves.

So there it is, the shirt of summer. Of course, I did make more than this over the last few months, as you may have seen if you follow me on instagram. I didn’t want to be one of those people who abandon their blog for instagram, since I’ve always been more of a words person than a picture person and the lack of details on instagram drives me a little batty, but I do think that I would have abandoned the blog regardless of if I had another outlet to share on, so I can’t blame instagram entirely. I have much more to say about many of the things I posted there over the summer, so hopefully I can manage to give them a proper write up before we’re all totally buried in pumpkin everything and cozy cowls and wool coats and all that.

P.S. Runner-up pattern of the summer: Grainline’s Driftless Cardigan. Our summers are never particularly warm (until October anyway), so I got a ton of use out of the three (yes, three!) Driftlesses I made. Plus I just finished a fourth in merino for the fall I’m sure we’ll get in December. It’s a great pattern. Goes well with a Santa Fe, or four. Ask me how I know.

Something strange is happening with me. I think I might be proceeding through sewing backwards. A few years ago, when I first started making clothes in earnest, I was most interested in sewing with knit fabrics. After all, it’s what I wore most, bought most in RTW, and I liked having incognito handmade clothes, things that looked like what I might buy in a store. I made like a thousand jersey dresses and tops. It was my thing. I had no interest in making garments from woven fabrics like most beginning sewers.

But lately, I’ve been feeling the woven fabrics. Trying to think about why, it could be because there are so many great prints from the quilting cotton designers showing up in rayon and voile, it could be because flowy and boxy woven tops are so in right now, it could be because indie pattern designers are making more fun patterns than the big 5 right now and many of those are for woven fabrics, or it could be because I’m just enjoying sewing with fabrics that press well after years of troublesome jerseys. So I guess I don’t really know. But in March, before work got crazy and I came down with the worst cold I’ve had in ten years and we had houseguests staying in the sewing/guest room and I didn’t sew anything for like a month, I made three woven tops. That I really like. And I’m gonna do it some more in the future.

But first:

beatrix top frontI started with double gauze. I had never worked with it before, never actually had any interest in wearing a garment made of it. Until I saw this print on Miss Matatabi. I mean, polka dot cat heads. My wardrobe has definitely taken a whimsical turn of late, and I’m digging it. So I went searching for a pattern that would be appropriate for just a yard of double gauze (I’m still cheap and buy as little expensive fabric as possible) and came up with the Made By Rae Beatrix Blouse. I started following Rae when I first started sewing bags, then sort of lost track of what she was doing once I moved on to jersey garments. But she’s been busy making a bunch of women’s woven patterns. And this blouse is really well drafted. I made a size Medium, A/B cup based on my measurements, and the fit is great. The bust darts are a smidge too long for me, not unusual, but that’s easily fixed for next time.

beatrix top backAlso, I am thrilled to report that I squeezed this blouse out of just one yard of 44″ wide fabric! I made View A with the shirttail hem, but with the contrast button band. I think using the contrast band made it possible to get it all on my fabric. It took me a while to find something that I liked for the contrast, but I settled on this pink linen. Since it’s 100% linen it does not behave well and wrinkles crazy, of course, but I love the color. And I think what really makes it are the buttons. I fell down the Etsy antique button rabbit hole searching for buttons for this top, and wound up ordering a bunch of other buttons too… They’ll find good homes soon.

beatrix back closeAs far as the fabric, other than my camera’s light meter apparently being totally unable to properly expose it, I found the double gauze very easy to work with. It pressed like a champ and didn’t fray too much. I finished all the seams with the serger, and rather than use the facings I finished the neckline with a bias strip of off-white voile that I had laying around – double gauze would not be suitable for bias tape, too wubbly. And I do like wearing the double gauze too. Sadly it needs to be ironed when it comes out of the dryer, something I’m not used to from all my jersey tops, but that’s true for pretty much all the woven fabrics I’ve been into lately.

lou box linen frontI had a bit of a squirrel moment with the next top – even though the Sew DIY Lou Box Top pattern was released last year, it wasn’t on my radar at all until a linen version popped up in my instagram feed in March and I was instantly obsessed. I spent about a week thinking about trying to draft my own similar top, until I remembered that I really don’t know how to slash hate drafting and I would rather support someone who does like it and so I just bought the pattern. I then immediately cut it out of a remnant of Marrimekko linen that I got at the Crate and Barrel Outlet (seriously, at the outlets they sell Marrimekko fabric remnants for 95 cents a pound, and the yardage is like $5 a yard, it’s amazing). This remnant was just under a yard and 55ish inches wide, but that was enough! I made the front and back rounded hem version, and both the front and back pieces fit easily on the fabric. (I did cut the bias neck binding from some white cotton lawn since there was no way I had enough for a bias strip.) To finesse the print placement, I even did a double-fold layout, so I could’ve cut the back on a fold too if not for the back neck opening. So even though the back is half blue, half silver, I literally just cut a sliver off between the two back pieces. It’s a weird print.

lou box linen backI made the size XS-S (which is, let’s say, not my typical size in most things), but with the boxy nature of the pattern there is a lot of sizing leeway. I don’t mind the ease, that’s kind of the point of the pattern, and I think in a drapey fabric it’d work too.

lou box linen sideThis fabric is a somewhat stiff 100% linen, so it really has a mind of its own. I think the extra body of the fabric is actually kind of fun and suits the style… until I sit down and wrinkle it, anyway. I do like the pattern, and I can see making more in various different fabrics. It’s basically my beloved Kirsten Kimono Tee, but in a more current (boxy) style.


sutton blouse frontAnd the last woven top I made before I was felled by illness was the True Bias Sutton Blouse, to wear to my anniversary dinner. I’ve been dancing around both this pattern and this fabric for a couple years – as in, I’ve almost bought both on many occasions and then just haven’t. But when I really started feeling the woven bug, into my various carts they went. It didn’t occur to me until I went to cut it out that this giant zigzag print might not have been the best choice for a v-neck blouse with a center front seam. I had a momentary freakout about pattern matching across the front, tried to figure it out, then just went for it and I think it worked out okay. I cut my usual True Bias size of 8 graded to 10, and I don’t think it’s too big, especially in this drapey fabric.

sutton blouse sideThe fabric is a Joel Dewberry rayon from several collections ago that is still in stock in a bunch of places. I actually ordered the recommended amount for the Sutton, 1.75 yards, but with my scrooge-like cutting habits I managed to cut the blouse out of just over a yard, simply by piecing the bias neck binding in the back. So I think I have enough left for a summer tank top too.

sutton blouse backI french seamed the whole top except the side seams, as instructed. While I’m familiar with french seaming technique, I have literally never used it in a garment (I’m lazy and I’m the only one who sees the insides of my clothes, after all). But now or never, I guess. It makes for a nice look on the inside, and at the neckline where serging might be hard to hide, but sewing the seam twice did make the center front seam a little wavy. Probably a combo of my cutting, which wasn’t particularly careful and might have shifted off grain, or my machine, which is not the most even feeder of thin fabrics. I also probably should have let it hang before hemming, since the hems are so straight across, but hey, I had an anniversary dinner to get to.

Since I love coining collective nouns, I’ve decided a group of woven garments should be called a ‘weft’. ‘Cause it sounds cool. And I will say sorry, this will not be the last weft of woven garments you’ll see this year. I went on a bit of a shopping spree when the weather was crummy and bought a bunch of gauze and rayons with visions of summer tanks and dresses dancing in my head. I am so excited about summer sewing, bring it on!

morris blazer

My sewing project choices have been very erratic lately. Kind of like our weather, I guess. I’m definitely done with winter, but I can’t really justify sewing summer clothes yet, even though when it’s not cold and rainy it’s practically summer weather. So I guess my compromise is to make light jackets. Which I can then wear over tank tops.

Anyway, I was seized recently with the desire to make a Morris Blazer. Now, I bought the pattern last year and immediately sewed up a sort of wearable muslin to make sure I liked the style. I used a random black and teal polka dot lightweight double knit I got from a friend. Now, why I thought this would be a good choice, I have no idea, but I have literally nothing to wear it over. I actually made this tee to go under it for photos last summer. Seriously.

morris take one

So, the verdict? I like the style, but the fabric was not up for the task. I had read that many people had the problem of fabric pooling on the front because the facings are interfaced but the body is not, and I can verify that the lighter the fabric the worse that problem. This fabric is a very light and drapey for a double knit, and as you can see the pooling is terrible. I did use knit interfacing, of course, but it still just firmed up the facing too much in comparison with the naked fabric of the front. I don’t hate this jacket, but I have never worn it. However, I knew I wanted to try the pattern again at some point.

Enter the nicest ponte fabric I have ever found. It is, of course, from The Fabric Store LA. Holy crap this ponte. I don’t remember what the fiber content was, but it’s so thick and smooth and pretty stretchy but oh so firm and springy. This fabric has the best recovery I’ve ever felt. I knew if any knit could stand up to the Morris, this would be it. It was also a great dark maroon color, which I judged to be rather more versatile than teal polka dots.

morris blazer 2

I did make some slight adjustments as I went, with the front pooling situation in mind. I considered foregoing interfacing entirely because my fabric was so thick and firm, but I really wanted a nice turn of collar, so I did keep the interfacing. However, I remember seeing in a review that someone who made this fused the interfacing with the direction of greatest stretch going up and down rather than side to side, to try to increase the drape of the facing pieces. I’m not sure if it helped, but I did that. Also, when I attached the facing around the front edges, rather than matching the corners and easing the body into the slightly shorter facings (even with sideways interfacing and a very firm fabric, my facings were about an eighth to a quarter inch shorter than the fronts), I laid everything out flat and trimmed the longer front pieces to match the facings. I think this went a long way to reducing pooling. There’s still a little tiny bit of wubble in the front corners, but it’s so, so much better.

morris front

Also, I have to say that my topstitching game was on point for this jacket. I am not the best topstitcher ever – in fact, my topstitching is usually terrifyingly uneven. But. For some reason, the sewing force was with me when I was making this jacket and the topstitching around the front is unnaturally even. Yet another reason this blazer has wormed its way into my heart.

And that’s it, really. I can tell already that this jacket is a great addition to my wardrobe, and though I’m not usually a blazer person, I am appreciating its ability to dress up an outfit.

The tank top I’m wearing under it in these pictures is a Burda tank I made over the summer with the leftover fabric from this dress. It turned out a bit too low cut (not a modesty issue, as I have no cleavage to expose, but just because it’s so close to my skin tone, I felt like I was all chest), but while trying it on to photograph the blazer I realized that it just needed a pleat in front to bring up the neckline. Problem solved, blazer-appropriate tank added to wearable wardrobe.


And lastly, here is how I styled my blazer for a night out a few weeks ago. Of course, I whipped up another Tessuti Ruby top to wear under it from the mustard rayon challis I bought as a lining possibility for my Cascade Coat. Needless to say, I’m glad I saved it for this outfit. And I love the way the Morris goes with the Ruby! So in a way this blazer is enabling my desire to sew tank tops in March. All summer sewing all the time!

I seem to be going through some kind of strange period in my life where I actually am interested in sewing somewhat complex projects. That has literally never happened before – previous complex garments, like jeans, have been tackled only out of necessity – but first I wanted to make a winter coat, and now I finally found the motivation to at last make the first of the three planned merino bike jerseys, supplies for which I’ve had for at least two years. Who have I become?

As a preface: I ride a lot. Like, a lot. If my work schedule allows, which is more than half the year, I ride every day for anywhere from 20 minutes to 3 hours. I do one or two long rides (30-40 miles) a week, and ideally a few times a year I do a metric or full century ride (60 or 100 miles). And I’ve been doing this for about 5 years now. So I have a pretty good sense of what I want out of a bike jersey. After trying a lot of brands and types, I discovered that I really like merino wool jerseys more than any kind of fancy synthetic athletic material. I understand this is a fairly uncommon opinion, but I like wool because it always keeps me the right temperature (summer or winter), doesn’t hold odor, and although it doesn’t “wick” the sweat away, it absorbs it all and doesn’t allow rivulets of sweat to run down my back in a gross way like the synthetic jerseys do (sorry if that’s TMI). I have RTW merino jerseys from SmartWool, Icebreaker, and Liv, and the former two companies are no longer making bike jerseys at all (which is of course because I was the only person buying them). Of all of them, the Icebreakers are my favorite both because of design and material, so imagine my delight when I found basically identical merino knits at The Fabric Store on my first visit. Finding a pattern took longer, but luckily my procrastination is so impressive that not one but two feasible jersey patterns were released while the fabric sat in my stash: the strange Simplicity 1361, actually an “equestrian performance shirt” but with the styling of a bike jersey, and the actually-designed-for-working-out Fehr Trade Surf to Summit top. I decided to start with the Surf to Summit because it seemed to require less modification, and with the raglan sleeves it most closely resembles my favorite short sleeve Icebreaker jersey.

merino bike jersey surf to summit

I did not make basically any fit modifications to the pattern, I just cut an XS grading to a S based on my measurements (which is somewhat surprising, in a RTW bike jersey I wear a M or L). I measured all the pieces and found that size would be very close to my Icebreaker jersey. While I didn’t make any changes to the basic fit, I did change about everything else!

To start, I modified the bottom hem of the pattern. I prefer a gradual hi-lo hem, rather than just a duckbill on the back, so I kept the length of the center back and center front, but added pieces to the bottom of the side piece and the sides of the bottom to make a gradual transition from the front length to the back length. I also drafted my own facing for the neckline and zipper. I wanted to make a full zip front, like my RTW jersey, so I copied its facing style. I started by tracing the top of each bodice piece to create its own facing piece, tracing down the center of the front piece as well, then I overlapped the front and side facing pieces by the SA and taped them together to make one piece. I kept the back facing piece separate and stitched it to the fronts once I had attached the zipper.

surf to summit hem adjustment

I also created my own pattern piece for the back pockets, rather than use the included pattern piece. I’m pretty picky about my jersey pockets, as I’m sure any frequent cyclist is, and I like the pocket arrangement on my Icebreaker jerseys best so I traced them off. Luckily, they basically fit onto the back of the StS, the pocket piece was only a little too wide. On this version I just made the pockets slightly narrower, but I think in future I would widen the back piece slightly and narrow the side pieces to compensate. Of note, my traced off pocket pattern piece is substantially less tall than the included pocket, and I still think these pockets are a smidge too deep.

surf to summit jersey back

I also borrowed the construction method around the back pocket from the RTW jerseys. First off, all my jerseys have a seam at the bottom of the pocket, rather than just have the pocket topstitched on along the bottom. I thought this was smart, so I laid the pocket on the back piece where I wanted it, cut the back piece along the bottom of the pocket, flipped up the bottom piece I’d just cut off, and stitched all three together. Then I turned the seam down and laid open fold-over elastic on top of it and stitched along the edges of the elastic through all layers. This is another feature on the Icebreaker jerseys – the pockets are reinforced on the inside of the jersey with FOE. I also added it, as they did, to the areas where the top of the pockets are stitched.

jersey pocket detailBack piece done, I constructed the jersey as instructed. To attach the zipper, I tried a suggestion I saw on Sewaholic recently – use fusible tape to baste the zipper to the knit fabric so it doesn’t get all wavy from the differential feed. I was excited to try this, but it only sort of worked, probably because my fusible tape was “Quilt-n-Bond” of unknown age and questionable origin (does it expire?) I’d like to try it again with a freshly bought package of stitch-witchery. But my real problem turned out to be that I interfaced the facings (with knit interfacing, but still) and so my facings ended up a bit shorter than the fronts and caused drag lines when I topstitched them down. Like on my RTW jersey, I topstitched the facings about an inch from the zipper using the coverstitch, trying to catch the edge of the facings on the back. The drag lines could also be because of my coverstitch – it doesn’t feed thin fabric evenly at all, and if I loosen the presser foot pressure any more I think the screw will come off. Any advice? Do they make walking feet for coverstitches? Do I just need to play with the feed dog speed dial?

surf to summit zipper mod

For the hem, I wanted to incorporate silicon-backed grippy elastic like on my RTW jerseys. I found several varieties on Sew Sassy a while ago, none of them as thin and flexible as I’d have liked, but fine (as a side note, they seem to have more options now, perhaps I will order more to try). I wanted the elastic just on the sides and back rather than all the way around, so I stopped it at the front seams. I attached it with a narrow zigzag, laying the elastic right side up on the right side of the jersey, then folded the whole hem under and coverstitched. For the sleeve hem, rather than turn under and topstitch I attached a hem band, again like my RTW model. I’m glad I did, because I think the short sleeve as drafted would be too short for my taste.

jersey hem detail

I added a folded over zipper shield to the top of the zipper, like on basically all RTW zip-up anythings. After puzzling out how it might be attached for about 20 minutes, I figured it out, but all it succeeded in doing is making it look like my collar isn’t the same height on both sides. It is, I promise! Also it hits my chin a bit because it sticks up from the collar, so it might be a RTW feature I abandon on future makes.

jersey with arm warmers

I also made arm warmers, because I had the extra fabric to do so, although I tend to prefer boleros to warm up my summer jerseys, so I’m not sure they’ll get much use. It was a good way to try out a different elastic attachment method, though. I added the same grippy elastic to the top, but this time stitching it on right sides facing and then turning it to the inside and topstitching. I think the method I used on the jersey hem worked better, though. The pattern piece for the arm warmers was simply the lower sleeve that I cut off, no extra length added or necessary.

in actionFinally finished, I photographed the jersey, then took it out for a test ride. While trying on the jersey in my street clothes, I thought the size was good, but after riding in it I realized I would prefer it to be tighter around my hips. As it was, the grippy elastic served no purpose because the hem was flapping loosely around my hips. This wasn’t so bothersome on the bike (I have a few other jerseys with a looser fit and no hem elastic), but when I stood up at stops or after the ride with my phone in the center back pocket, the back hem just hung down too low in an annoying way. So I took a deep breath and headed back to the sewing room, where I picked out the coverstitch on either side of the front side seams for a few inches, resewed those seams tapering out about an inch at the hem, then folded it back up and re-hemmed. I think I took off about four inches total from the hem, and it’s a much snugger fit now. So I guess I could’ve started with a straight XS. Next time before I cut I’ll try to take the excess out of just the side pieces, to preserve the width of the front and back.

So, I have my first handmade bike jersey! I will say, this is the rare project that actually does save money – I paid about $30 for the fabric and maybe another $5 or $10 for the notions, but even on sale my RTW merino jerseys were in the $60-80 range. And they don’t exist anymore anyway. The extant merino bike jerseys from other companies range from $100 to a baffling $210, so I feel like I’ve made a sound financial decision here. I do like the level of detail on the RTW jerseys, things I can’t or don’t want to do as a home sewist, like overcast topstitched seams and reflective piping bits and a mesh panel in the same color fabric, etc. But if going forward making jerseys is the only way to get the jerseys I like most, I guess I’m in for some more complex projects. But not next. Next I just want to make a boring plain top.

Despite the fact that I’ve been sewing garments for myself for more than 5 years, I had never sewn a real wool coat. Something about it seemed just too advanced, too fiddly and time consuming for my slapdash style of sewing. But finally, I have rallied and actually completed my first real coat, the Grainline Cascade Duffle. I feel like I’ve achieved a real sewing milestone!

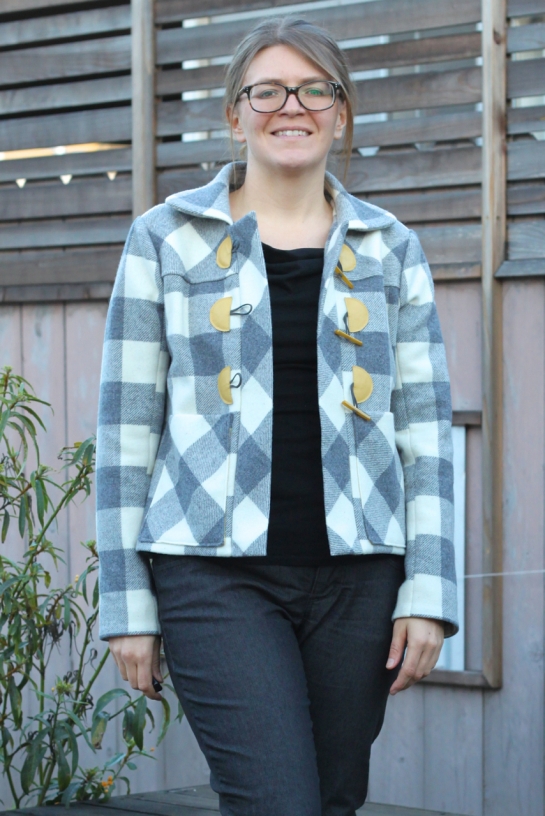
cascade duffle frontI’d had it in mind to make this coat since its release last winter, but was spurred into action while visiting Fancy Tiger Crafts in October, where I saw the printed pattern for sale. Because I was sure I didn’t want to print and assemble a pdf coat pattern, I snagged it. And because my mother is a terrible enabler (don’t worry, I’m hers too), she prodded me to buy fabric for it then and there. Of course, Fancy Tiger has a nice selection of gorgeous wools, and I fell for this off-white and gray plaid. It was mom’s brilliant idea to pair it with yellow – there was a bolt of mustard jersey nearby, and she pulled it over and said, “the toggles should be this color”, and I was sold.

I then embarked on an epic quest to find the rest of my supplies. Luckily, I was working in LA in November, so I was able to make two treks to the Fashion District. I could not get mom’s suggestion of yellow toggles out of my head, so I headed to a tiny leather shop I found a while ago (X Trims & Leather, on Maple between 8th and 9th, for those in the area), where I found a scrap of a sort of pale yellow leather that looked good with my wool and was only $5. (I have a fair bit left, of course, I’ll have to explore other trimming uses for it in the future.) Unfortunately I could not find leather (or any other) cord that matched it anywhere, so I decided to use gray leather cord instead, and try to source yellow toggle buttons. That was a whole other ordeal, but I finally found some likely candidates online at Benno’s Buttons. They’re a bit smaller than I’d have liked, but they work. The lining was also a bear. Leather swatch in hand, I scoured the Fashion District for matching lining and came up empty. I found the perfect mustard color in a rayon challis with a very soft hand, and though I worried it would be too drapey and also too annoyingly sticky for the sleeve lining, I bought it anyway to use as a last resort. I ordered a mustard lining fabric from fabric.com, but of course it was entirely the wrong color when it arrived, too dark. Then on a whim I went into an old-school local fabric store in the town where I used to work (an hour away), and in a disused corner of the store found maybe 5 bolts of lining fabric, one of which was a perfect match for the leather. Go figure. And after all that, I totally forgot to buy a zipper. D’oh! I ordered two zippers online, neither of which matched my fabric when they arrived, so I said screw it and decided to omit the zipper. I live in Southern California, after all, this wool coat will be plenty warm even without closing all the way.

cascade duffle openThen the holidays happened, and the coat didn’t. I set it aside for a variety of other projects, as I have for every other coat or complicated project I’ve ever planned on making (supplies for all of which are still languishing in stash). This coat would likely have met the same fate, except that my enabler, who pushed me to buy the fabric in the first place, actually held me accountable. Every week when my mom called me and asked “are you working on your coat?” I was actually motivated to get on it. Also helping were the dual motivations of Indie Sew Coat Month and the Fancy Tiger coat sewalong, which seemed appropriate since I bought my fabric there, after all. (I almost wish I lived in Denver so I could hang out on Fridays and sew with them in person! But the snow…)

I finally started it in the second week of January. It took me three solid nights to cut it out, with the plaid matching, the lining and all the interfacing. I matched the plaid line across the front and back pretty well, using, as I generally do, the lengthen/shorten line as a guide. I did the same with the sleeve pieces, but I should have used the notches instead because one of my sleeve seams match but not the other one (does that mean one of the sleeve pieces should have been cut slightly off grain?). Of course, the unmatching seam is the front one. Ah, well. I also failed to consider the directionality of the light gray squares, which are made up of small gray and white stripes that are fairly obvious up close. When I cut the pieces on the bias (the yokes, pockets, and front bands), I didn’t realize that cutting them doubled with the fabric folded as usual meant the stripes would be going vertically on one piece and horizontally on the other. As a result, one whole side of the coat has the stripes going perpendicular to the stripes on the other side. I’m going to assume no one would notice unless I point it out, since I didn’t even notice until I had assembled most of the coat shell.

cascade duffle detailOf note: I bought only the recommended amount for View A (the fabric was 55″ wide), despite the fact that I was using a plaid and it occurred to me after I’d gotten back from Denver that I wanted to cut a fair number of pieces on the bias, and yet I had exactly the right amount of fabric, with only the most minor puzzling of pieces. (I even had enough scraps left to make a ham and a sleeve roll for pressing, which I’ve been meaning to do for a while also.)

I cut a size 8 in the shoulders/bust, based on my 36″ bust measurement, and graded out to a 10 at the hips. My measurements actually put me in a 12 for the waist/hips on Grainline’s chart, but I usually only grade up one size, and with the a-line boxy shape of the pattern I wasn’t worried that it wouldn’t be big enough. My instincts were right, the fit is spot on. When the coat is open, you can see the swing shape, but when it’s closed it’s closer fitting in back.

cascade duffle sideAs a side note, I think I found an error in the pattern when I was adding the interfacing (I used tricot fusible at Jen’s suggestion, mine from Fashion Sewing Supply). The front and back armhole interfacing pieces are labeled wrong. I puzzled over why the front armhole interfacing piece was such a bad fit for the front armholes for a while before I tried it on the back instead, where it was perfect, and then found that the piece labeled “back” fit exactly on the front. Not a big deal, but I hadn’t seen anyone else mention it.

Once I had everything cut out and fused, which took forever, the actual construction went pretty fast. The toggles took a good amount of time (probably an hour and change) to attach, because I taped them in place as suggested in the sewalong and then it took forever to pull off all the little tape bits once it’d been sewn through. My leather is not suede, but it’s still a bit softer than regular toggle leather, and the tape stuck pretty good. After sewing a couple test toggles with various feet, including a teflon foot, I settled on the zipper foot, so I could keep a closer eye on the edge of the toggle in a (somewhat vain) attempt to maintain an even topstitching allowance. I went super slow around the curve, stopping after most every stitch and lifting the foot to adjust the angle slightly.

I was delightfully surprised by how easy the wool was to sew. This will come as no shock to people who’ve sewn with wool coating before, I suppose, but it was nice and squishy and so easy to ease, it fed through my machine amazingly well, even when there were tons of layers, and it was easy to manipulate and press into submission. Everything matched up pretty perfectly, which doesn’t usually happen with me, and I credit the flexibility of the wool.

Also, my only real screw-up was sewing the hem facing on upside down, due to brain-dumbness. I would have appreciated some notches on that piece and the sleeve facings for that reason, so I wouldn’t have had to reason it out. Sometimes curved pieces are just too brain-twisty for me. Of course, I only realized my error after I had graded the seam and understitched, I unpicked it all and attached it correctly, and then I had to eyeball a slightly more than 1/4 inch seam allowance when I attached the lining to the hem facing because it had been trimmed on that side. I also stitched in the ditch up from the hem on the side seams and sleeve seams, and hand stitched the hem facing to the body in two other places to make sure the hem facings don’t fall down at all. The back hem does swoop out a bit, I probably should press and steam it some more.
cascade duffle backI had never bagged a lining before, but I’d read a million tutorials for it, and while they didn’t make a ton of sense out of context, as soon as I had the actual coat before me, the method became very clear. In general I found the Grainline sewalong posts useful, not because the pattern instructions were sparse, but because I found it helpful to see the details rendered in real fabric, particularly when it came to knowing what to trim when grading seams.

cascade duffle liningI appreciate that this pattern seems much more accessible than a traditional Big 5 tailored coat pattern, and it doesn’t seem to require all the complicated hair interfacing and padstitching and rolled lapels etc that I’ve read about and been intimidated by all over the internet for the last several years. I think this coat is a perfect intro to wool coat sewing. The collar was straightforward, it doesn’t require sleeve heads or shoulder pads, and no buttonholes, bound or otherwise. For me, I don’t know that it’ll lead to more complicated coats, just because as a Californian I have little need for wool coats, and I already have like 4 RTW ones, but I could see the Cascade being a gateway coat for others more inclined to wool-wearing. I could, however, see myself making another version in a lighter, more casual fabric, if the duffle coat trend continues. But… probably not anytime soon. I’m just gonna savor my victory for a little bit.

I’ve decided that the collective noun for a group of sweatshirts should be a “cozy”. And the reason I have had to come up with a collective noun for a group of sweatshirts is that I’ve made a lot of sweatshirts in the last few weeks. It’s actually winter here, el nino is real, and I have been very cold. So out came all my stashed french terry and merino and any other soft, warm seeming fabric, to quickly become my cozy of sweatshirts.

bethuoiaI actually started before Christmas, with one last minute selfish make to take to my frigid Nevada familial home for the holiday. I loved the Elle Puls Bethioua pattern as soon as I saw it, and I cut two out at once, one for my mom and one for me. I made mine from a cool striped french terry merino from The Fabric Store, with very subtle stripes on the right side and more obvious stripes on the loopy side. I thought I would be clever and use the loopy side for the bands, as a contrast, but that may have been foolish as I have already snagged the loops several times on various things. I guess french terry is designed to keep the loops on the inside! I made a size 38 graded to 40 at the hips based on my measurements, and I made the bottom band much wider than is called for in the pattern (my piece was 6″ tall rather than 2″), so it’s more like a traditional sweatshirt band.

lane raglan sweatshirtMy next french terry use was far more traditional. I had this yellow and navy cotton french terry from GirlCharlee that I bought along with a scrap of heathered navy baby ribbing for the bands. I’d never actually used real ribbing, believe it or not – I’ve just always used regular jersey for neckbands and such. I’m really glad I had the ribbing for this top, though, because this terry has basically no recovery, so I could never have successfully banded it with self fabric. In fact, the seams got pretty stretched out when I serged on the bands, but they mostly shrunk back when I washed it. The pattern is the Hey June Lane Raglan, just because it’s the only traditional raglan pattern I have, and that’s what I wanted. The neckline is a bit wide, and it wound up maybe a tad longer than I had anticipated, but I actually kind of like it, and it certainly checks all the sweatshirt boxes.

halifax hoodie pocketNext I wanted to take the cozy factor up a notch, so I eagerly printed and assembled the (horror!) 45-page pdf for the Hey June Halifax Hoodie. Ordinarily I would only assemble the pieces for the view I want to make, but with this pattern I knew I wanted to make all the views – take that, scotch tape supply! I started with the more traditional sweatshirt view with funnel collar and kangaroo pocket. One of the testers made a great version with contrast trim on the pocket and a contrast inner collar, and I really liked that idea. I had this great orange reversible doubleknit in my stash that I bought at JoAnn years ago with the intent to use it for a colorblocked dress of some kind, but in the years I’ve had it, no pattern called its name as loudly as this sweatshirt, so separates it was. One side is a solid orange and the other side is a teeny tiny orange and white stripe, so it just reads as light orange from far away. There are also subtle sparkles in this fabric, not my favorite feature, but hopefully it’s not too noticeable.

It was a bit of a brain twist to remember which side of the fabric was my intended right side for each pattern piece, but I managed to assemble it without any unpicking of wrong-side errors. For the funnel neck, I cut it as two pieces rather than one as the pattern instructs so I could have the contrast only on the inside, but of course I forgot to add seam allowance to the top edge, so my collar is a scant 1/4 inch shorter than it should be – I moved the buttonholes down accordingly. Now I just need to find an appropriately colored cording for the collar… easier said than done. It might have to wait until my next trip to the LA garment district, since I can’t even find regular plain buttons anywhere around here. Anyway, I really like how this turned out. Again, a bit longer than I would have thought, but I think it works.

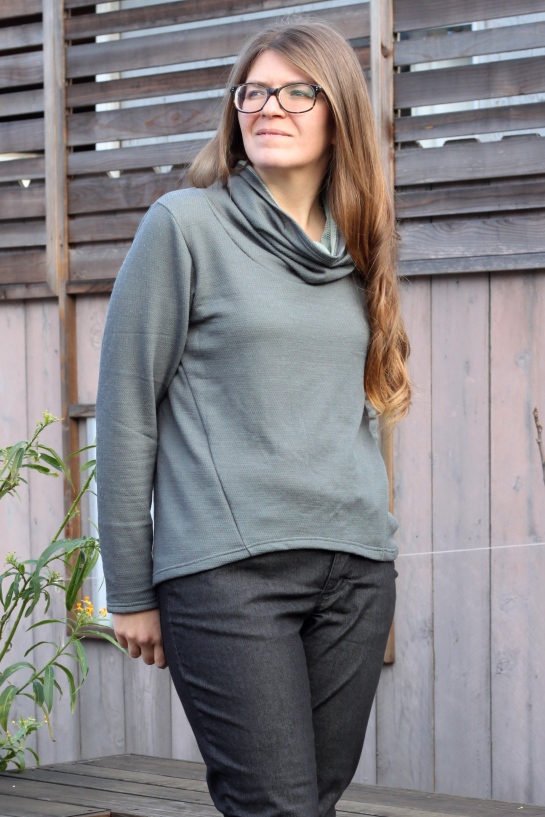
halifax hoodie asymmetricalI immediately moved on to the other view, the asymmetrical side seam version. I had this great waffle texture thermal merino from The Fabric Store that is grey on the right side and a kind of grey-teal on the wrong side, which I wanted to showcase on the collar. Rather than cut the funnel neck with the top on the fold, I extended the top out about 6 inches, with the hope that it would drape down and reveal the wrong side. However, this is a pretty narrow collar, so it doesn’t really drape like I’d imagined. I also didn’t want to use the hem band, so I attempted to lengthen the bodice by about an inch and a half. Unfortunately this wasn’t quite enough, or I am just not a fan of the high front hem, because I’m not super happy with the length. Maybe I should go back and add the hem band? I’m not crazy about this top, which is perhaps evident in the fact that I’m making stupid faces in all the photos I took of it. Does anyone else find shooting things that were a disappointment harder than things that turned out exactly how you imagined?

cropped auroraAnd for my last foray into cozy tops, I cut into this totally awesome polka dot merino jacquard(?) I got at The Fabric Store in the fall. It’s nice and sproingy and fairly lightweight, so I decided to basically make another boxy dolman sweatshirt like my Echino leopard top from October. I used the same hack of the Hey June (apparently Hey June is my spirit sweatshirt pattern company) Aurora tee, cutting it short and boxing it out, and adding a hem band (6″ tall piece, again). I made the sleeves longer this time, though, as befitted the warmer fabric.

jacquard scarfAs a bonus, looking at the orange doubleknit and the polka dot merino on my cutting table together, I realized they matched perfectly, so I made a quick infinity scarf with the scraps! I had to piece both fabrics to make it long enough with the scraps I had left, so there are two seams instead of the usual one, but I took the opportunity to flip the reversible fabric so part of the scarf is solid and part is striped. Pattern overload, as usual, but I think you can get away with it in a scarf.

Anyhoo, I’m feeling much warmer now.

As far as the new year goes, I don’t have anything really profound to say about last year in my sewing life, other than that (as probably evidenced by this post) I think it was the year of separates. Now that I’ve made several successful pairs of pants and shorts, I’ve been making and wearing many more tops than dresses, which were my go-to garment for years. As far as my favorite makes of the year, well, they’re what I blogged. I made a bunch of other things too, but I’m not too inspired to write up anything that I don’t love. As for what’s next, after five easy sweatshirts, I’m finally ready to make something complicated, so I’m tackling a wool Cascade Duffle Coat. After that, who knows? Maybe something that’s not motivated by winter, eventually.

It’s a familiar refrain (for me, anyway): where did this week/month/year go? I can’t believe this year is basically over. I may manage to put together some kind of year in review by, like, February, but for now I thought I’d squeeze in a couple dresses that I made way back in March of this (nearly over) year. It seems like a party dress kind of day, after all.

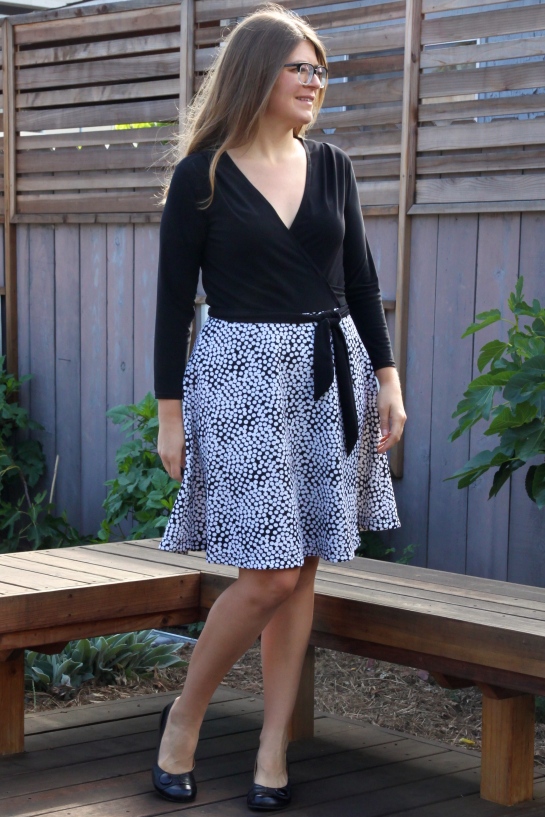
dvf wrap knockoffEver since I went to the DVF exhibit I’ve been wanting to knock off this black and white wrap dress. I knew this cool dimensional knit would be perfect for the skirt, and I had the black ITY in my stash for the top. I mashed up two different wrap dress patterns to get the design I wanted: the bodice is Butterick 5454 and the skirt is Vogue 8379. I actually think this combo makes my ideal wrap dress – I prefer shoulder pleats to waist pleats in a bodice, and I like the half-circle wrap skirt much better than the straight pleated wrap, which never sits right on me. I can imagine I’ll use this mashup again.

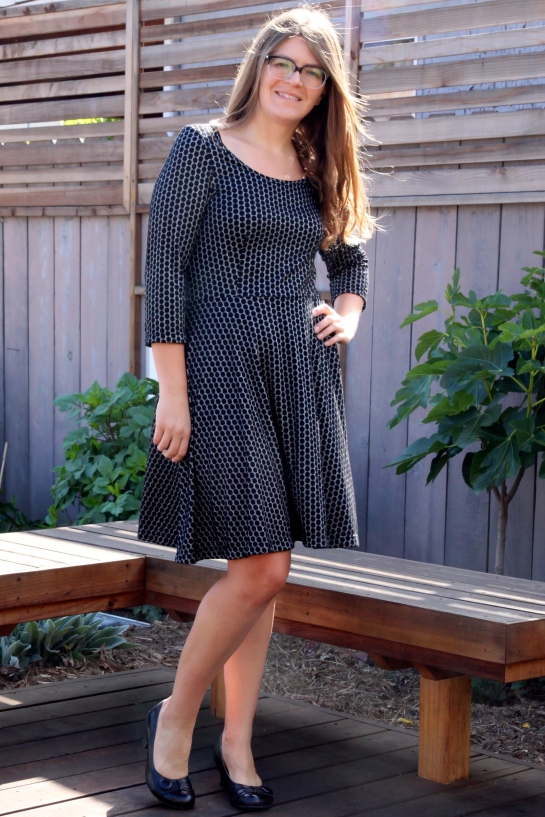
boden jacquard knockoffMy second winter dress knockoff was inspired by this Boden jacquard knit dress. I found a very similar jacquard poly knit at fabric.com (of course it’s not there now) and went pattern hunting. I wound up combining the bodice of McCall’s 5927 with my trusty Tiramisu half-circle skirt. The bodice as drafted has a high neckline and I wanted more of a scoop, so I freehand lowered the neckline by a couple inches. I just turned and coverstitched the neckline. It was a super quick dress to put together but it looks pretty fancy – I love when a cool fabric does all the work!

dvf wrap knockoff 2boden jacquard knockoff 2

I’ve worn both of these dresses quite a bit this year, turns out having dressy-ish black dresses in your closet can come in handy for those last minute events you didn’t have time to make something new for. Like, for instance, when the end of the year totally sneaks up on you.

Happy New Year!


PS I’ve finally (thanks to a tech upgrade Christmas gift) joined Instagram! If you’d like to follow me you can find me as aleah_42.

I make a lot of bags for myself, actually, but they don’t always make it to the blog. I started out sewing bags, after all, and even though I make far more clothes, I do still enjoy making bags for various needs and occasions. Frankly, I think there’s just so much great fabric out there that is not suitable for garments, so I have to use it somehow. Echino, I’m looking at you.

IMG_0331Anyway, very occasionally I make a bag that I don’t think anyone has really made before. This little front zip cross body bag was inspired by a friend’s RTW leather purse that I admired and then thought, wait, I can figure this out! I actually managed to take notes and pictures along the way, so I thought I’d throw together a tutorial for it, in case anyone else has a thing for grommets on bags like I do. And yes, finally, it’s another bag tutorial for those of you who subscribed to my blog because of my messenger bag tutorial and then thought, jeez, what’s with all the clothes?

This is not a super detailed tutorial – it’s probably best for folks who’ve made a zipper pouch or two and are familiar with the basic process of getting a zipper onto a lined bag.

So if you’re looking for a quick last-minute gift, or just need some cute fabric in your life in the form of a bag, the tutorial begins after the jump.

IMG_0341

Read More

I always have a really hard time with fall sewing. Mostly I think that’s because we don’t really have fall here on the coast – our hottest months are September and October, then November is all about food, not sewing, and then it’s magically winter, bam. So I end up sewing summer clothes until almost Thanksgiving, then switch straight to winter things. I make a ton of spring clothes, because our spring lasts like 6 months, then I wear those things the following fall, but I never get to make any real fall-specific things. But this year I cracked the code: I took a trip in the fall to a place that has fall! (Boulder and Denver, Colorado, to be exact.) And because of course for any trip I have to frantically make as many new garments as possible, that meant I sewed a whole fall mini-wardrobe in October. Real fall clothes, at last!

My quote-unquote inspiration for this “collection” was a great pair of brown heeled oxfords I found on Zappos (not there anymore, but here they are at 6pm) and just inexplicably loved. I don’t usually go for that vintage-y style (for myself – I love it on other people), but I thought I could pull these shoes off. I imagined them with cuffed jeans and sort of boxy tops, and started compiling a wardrobe built on warm browns and complimentary colors.

natalie top side

I started with a Liola Patterns Natalie shirt in a lovely dark maroon bird print voile that I picked up at Hart’s in Santa Cruz this summer (great store, totally worth a stop if you’re anywhere nearby, but I took the rest of the bolt of this one, sorry!) I’ve realized that I will never wear a traditional button up collared shirt (again, love them on others but they just don’t feel like me), but I quite like shirts that are kind of riffs on button-ups. I liked that this pattern is collarless and has a front detail that is sort of a deconstructed placket.

natalie top close

I sewed up the pattern pretty much exactly as drafted. I graded from a M on top to a L at the hips (wise choice, for me), and the only thing I changed was that I shaped the hem for more of a shirttail look. I initially thought that I wanted a lower front slit than the pattern suggests because 4 inches didn’t look like much on the pattern piece, so I made it 5 inches down from the top and that was somewhat indecent, so I sewed it up to the pattern suggestion after all. The neckline is more of a scoop than it looks on the flat pattern, so the modest slit turns out not so modest in the end. It took some careful stitching and a small amount of unpicking and redoing to get the front pleat to lay perfectly (I used my blind hem foot so I’d have an edgestitching guide), but it got there. I recommend a fabric like this with a not-too-different wrong side, since a sliver of wrong side might show unless your stitching is super exact (which mine never, ever is).

echino jersey sweater

I knew my mini wardrobe had to include this awesome leopard spot Echino jacquard knit that my mom got me for my birthday, and knew that it had to be a sort of boxy sweater, but I wasn’t sure what pattern to use to realize my vision. Not helping matters was the fact that this fabric is only 30 inches wide. Luckily I had 2 yards, and I used every ounce of it. Happily, my leopard placement worked out perfectly (although there are some disembodied paws on one shoulder…) The fabric is lovely, lofty but surprisingly light, not too stretchy but enough that it still feels like a sweatshirt knit. I really, really love it. Echino, make more knits, please!

echino sweater 2

I ended up using the Hey June Aurora tee pattern as my base for this boxy dolman look. I kept the neck/shoulders/sleeves the same, but I boxed up the shape by cutting basically straight down from the armpits and cropped it several inches from the bottom. I used my remaining fabric to make a hem band to complete the boxy look (the size of the band was determined by my fabric scraps, I would have preferred to make it just a smidge longer). I bound the neckline with a scrap of ivory jersey rather than with self fabric to cut down on bulk, and I just turned and hemmed the sleeves. And I have to say, it turned out exactly how I wanted it. This is probably my favorite make of the year so far!

camas and hudson 2

I also thought I should make something that would be comfortable on the airplane (particularly because my flight left at 5:40a – why, why do airlines think people should be flying that early?), so I pulled out some soft brown french terry from GirlCharlee and whipped up a pair of True Bias Hudson pants. I actually made a pair of Hudsons last winter, although I was on the fence about the style, and then ended up wearing them basically every day… when I wasn’t going to leave my house. But this year I vowed to make a pair that I would feel good about wearing in public. I’ve been seeing knit track pants in stores and catalogs, they must be a real thing, right? So I made them and wore them on the plane and around Boulder when we arrived, and of course didn’t see a single other person all day wearing track pants. At one of the biggest airports in the country! And let me say, all those people flying in jeans are doing it wrong. French terry Hudsons are definitely the way to go.

I made a size 10 in accordance with the size chart and the fit is great. They go together really fast and the topstitched gathered waistband is really easy and looks very RTW. I omitted the drawstring on this pair simply because there was no way I was finding any appropriate drawstring anywhere in a 40 mile radius (more on that later). And these are seriously the most comfortable pants I’ve ever worn in public.

camas and hudson

If I was gonna dress down on bottom, I thought I’d better dress up on top, so I decided to make another Thread Theory Camas blouse to go with the Hudsons. I picked up this lightweight slubby jersey in the swap pile at the LA Sewists meetup last summer, and I paired it with some light brown cotton lycra jersey scraps I had leftover from some long-ago gift (a draped cardigan for a friend, I think?) I didn’t double the yokes because my yoke fabric was already so much heavier weight than my main fabric, and also I didn’t have enough anyway. I also didn’t attach the button bands as instructed – the instructions seem like they’re for a woven or more stable fabric, and this was so light and drapey I wanted as easy as possible. I interfaced the band facing, sewed the band and facing together along the neck edge, turned and topstitched, then just serged the finished band onto the blouse. There are some drag lines along the front, but that’s just ’cause the fabric is so drapey in the body and the interfaced bands don’t drape as much. Because of the drape, this version feels much lower-cut than my previous version, but I’m generally okay with super-low necklines (lack of cleavage to the rescue!).

Surprisingly, it turned out that the hardest thing about this top was finding buttons. Ridiculous, right? I just needed 5 matching off-white translucent buttons. But there is literally no place to buy buttons in my city. My city of around 200,000 people, a major tourist destination, is home to exactly one garment fabric store (which is super expensive and not my taste and closed for remodeling anyway) and one chain craft store (Michael’s, which carries black and white buttons and of course the sort of multicolored plastic buttons you glue onto cards but would never sew onto garments). The woman at the antique store I thought might have some vintage buttons (they didn’t) actually suggested I go buy a shirt at the thrift store and cut the buttons off of it. Seriously. I was leaving on a trip in two days and didn’t want to waste the time driving 50 minutes to the nearest JoAnn, or 35 minutes to the nearest regular-ol’-local-fabric-store, so I resorted to pillaging 5 almost-matching buttons from the random-notions box in my theatre’s wardrobe office. This is what happens when I want to make something spur-of-the-moment. Anyway, sorry, rant over.

stripe top and boyfriend jeans

Now, before you go thinking that my whole vacation wardrobe came out perfectly (barring button frustrations), I did have one dud and a near-dud. High on the perfection of my first three tops, I got cocky and decided to make something awesome with a brown and white striped rayon knit from the stash (probably picked up at the Loft last year). I didn’t know what, though, so I googled “striped knit top” and found the image of a dolman sleeved top with a diagonal seam across the front with offset stripes and thought, I can totally hack that. I went back to the Aurora pattern, tracing the front piece in full and then cutting it diagonally and adding seam allowances along that edge. Then I cut the front pieces singly, offsetting the stripes. I even copied the longer curved back hem of the inspiration. It came out exactly as planned. And the result? Meh. I don’t know why I don’t like this top, I just don’t. It feels frumpy and casual in a not-cool way. Maybe I shouldn’t have topstitched the neck in white? Maybe it needed a less drapey fabric? Anyway, not a fan.

boyfriend jeans side

Especially not paired with my near-miss, a pair of attempted boyfriend jeans. I had this light denim from… somewhere (I absolutely cannot remember when or where I got this fabric) and got it in my head that it would be right for a more relaxed cut boyfriend style. I used my trusty Thurlow jean hack, but I cut the legs wider starting just above the knee. I erred much too wide, though, and had to spend like an hour trying the jeans on, taking various leg seams in (including ones I’d already topstitched, d’oh!) before I got an even almost acceptable leg silhouette. They do definitely read casual, but again, maybe not in the cool way. I have to be very careful pairing these jeans with tops – too slouchy and casual and they just look unflattering. They’re not bad with a dressier top, but of course I only photographed them with the fail-shirt, so you’ll have to take my word for it.

But all in all, a pretty good fall wardrobe accomplished in just two weeks. That’s more fall things than I think I’ve ever made in the actual fall. And of course, because one thing made equals 5 new fabrics bought, I have to share my goodies from Colorado!

co fabric haul

The patterned cottons on the bottom are from Boulder, where we found a lovely shop called Fabricate just down the street from our hotel with a beautifully curated selections of cottons (seriously, this shop owner and I are fabric soul mates – there were so many geometric mustard prints!). Not too many garment fabrics here, but I did score some not-yet-released Echino fabrics that the proprietor had just brought back from quilt market. Look at those shiny wolves! Echino is my absolute favorite fabric for making bags, and those wolves are going to make a fabulous evening clutch.

Then in Denver we visited the amazing Fancy Tiger Crafts. Why, why can’t there be a shop like this in my town? (Oh, probably because we apparently can’t even support a store that might sell plain buttons.) I could spend hours and hours in that place. As it was, I came away with some lovely shirting, a beautiful wool, and a printed pattern to go with both! I was so glad to see the Cascade Duffle Coat pattern in print, because I have been wanting to make it but in no way wanted to print and assemble that pdf. I also couldn’t resist the hand painted ombre yarn, even though I would characterize my knitting as “amateur” and “sporadic” at best. (I do go through knitting phases, though, and I will say that this yarn has already become an ombre cowl scarf…) And talk about service: my yarn didn’t end up in my shopping bag somehow, and I didn’t realize it until we had already cycled back to our downtown hotel from the (very, very cool) neighborhood where Fancy Tiger is located, but when I called the shop, one of the employees offered to drive downtown to bring me my yarn. Amazing! Seriously, if you’re ever in Denver, do not miss Fancy Tiger.

And now, on to winter sewing! It’s finally taken a turn toward cold here, and I’m imagining cozy sweatshirts and merino everything. And maybe more Hudsons. And hopefully a duffle coat before Christmas… we shall see.

So I guess summer’s finally over? It’s been hard to tell, since September and October are always the hottest months of the year here, and this year our 90-to-100-degree heat wave was accompanied by 90% humidity and lasted for about 6 weeks. I have never been so sticky in my life. Anyway, we seem to have finally reverted to what passes for “fall” around here (daytime temps in the low 80s cooling to high 50s at night), so I thought I should share my favorite make of the summer now that I won’t be wearing it again until next year.

I was intrigued by the True Bias Southport Dress from the time it was announced, but I did a lot of hemming and hawing before I actually bought the pattern. I liked the silhouette and style, but wasn’t sure if it would work for my body without a ton of modification (with a small bust but broad shoulders and low armpits, woven tanks do not usually work out for me). But coming up to my trip to Seattle in July, I just went for it with some Kauffman dot chambray I had purchased specifically for this purpose. And I’m so glad I did. I know everybody and their mother have already blogged this pattern (probably in this very fabric), but too bad, here’s another one.

southport dress

Because True Bias patterns are drafted for a C-cup and I am decidedly less than that, I decided to make a standard, by the book SBA of about a half inch. Okay, I realize that in a traditional SBA you shorten the unaltered half to match the shortened half under the dart, but I lengthened under the dart instead to keep the original bodice length. I wanted the blousing, and I’m not short-waisted at all. I cut a size 8 in the shoulders/bust grading out to a 10 at the waist according to my measurements. And wouldn’t you know, the bodice fits great! After many wearings, I have realized that my preference would be to have the bottom of the armholes a bit lower, but that’s easily adjusted for next time.

southport sba

I graded out to a size 12 in the skirt, because while I am not gifted up top, I have an overabundance in the behind, and the skirt as designed looked pretty slim through the hips. And indeed it is – in this non-stretch fabric the ease is just barely enough. I have to hike it up pretty high to ride my bike in it… but that hasn’t stopped me.

southport back

As much as I love this dress and this design, can I just put it out there that I hate bias bindings with a fiery passion. I just can’t make them sit flat. Yes, I understitched, but it was not enough. I think I’m so used to knit bindings that I stretch my bias just on instinct when I sew and that’s what’s messing it up? Should you not stretch woven bias bindings at all? Curves in all patterns have always been my nemesis (…nemesises? nemeses!), and bias binding curves just exacerbates the problem. I also chose to use some green print cotton bias I made a ton of forever ago (a fat quarter makes a lot of continuous bias tape), so it’s more noticeable peeking out than if I’d used self bias binding. Let’s just call it a design choice. I also apparently didn’t pre-shrink my homemade bias tape, so after the first wash the straps gathered themselves a bit.

southport dress pockets

I made no other modifications to the pattern (I actually like that the drawstring casing at the waist is on the outside, I think it’s a fun design element for a casual dress), although I will confess to not bothering to make functional buttonholes – so unnecessary with the wide neckline, and I am very lazy. I just sewed a short, dense zigzag through the plackets at each button location and then sewed the buttons on top of that stitching. I like to do that because it’s more security than only sewing the buttons on through both layers, but it maintains the illusion of a button fastening more than stitching down the whole placket along the topstitching line.

And that’s pretty much it. I just really, really like this dress, and I wore it at least once a week all summer. I fully intended to make another version, but my summer sewing was not as prolific as I’d hoped it would be and it never happened. I’m currently thinking about how I might add sleeves to this sucker, though…