Front zip cross body bag tutorial
I make a lot of bags for myself, actually, but they don’t always make it to the blog. I started out sewing bags, after all, and even though I make far more clothes, I do still enjoy making bags for various needs and occasions. Frankly, I think there’s just so much great fabric out there that is not suitable for garments, so I have to use it somehow. Echino, I’m looking at you.
 Anyway, very occasionally I make a bag that I don’t think anyone has really made before. This little front zip cross body bag was inspired by a friend’s RTW leather purse that I admired and then thought, wait, I can figure this out! I actually managed to take notes and pictures along the way, so I thought I’d throw together a tutorial for it, in case anyone else has a thing for grommets on bags like I do. And yes, finally, it’s another bag tutorial for those of you who subscribed to my blog because of my messenger bag tutorial and then thought, jeez, what’s with all the clothes?
This is not a super detailed tutorial – it’s probably best for folks who’ve made a zipper pouch or two and are familiar with the basic process of getting a zipper onto a lined bag.
So if you’re looking for a quick last-minute gift, or just need some cute fabric in your life in the form of a bag, the tutorial begins after the jump.
Supplies:
- half yard of both your exterior and lining fabrics
- one 9 or 10 inch zipper, I like the chunky #5 size (I find it easier to work with a purse zipper that’s closed on both ends, but the regular closed-bottom kind will work too)
- two large grommets (mine are 7/16″, the biggest you can get at a regular craft/fabric store)
- two dog clips of your choice (I like the round ones, I got mine here)
- (optional) one 7″ zipper for an interior zipper pocket, if you so desire
Cutting your pieces:
out of both the main fabric and lining:
- 12″ by 11″ rectangle for the back
- 12″ by 8″ and 12″ by 3″ rectangles for the front
out of the main fabric:
- 2 1/2″ by approximately 44″ (width of fabric) strip for the strap
- two 1 1/4″ by 4-5″ scraps for the zipper tabs
out of the lining fabric (optional):
- a 10″ by 12″ or so piece for the interior zipper pocket, if using
Interfacing:
I interface both my exterior and my lining fabrics, using regular craft-store Pellon fusible. I use a heavier weight interfacing for the exterior and a lighter weight for the lining. I cut my interfacing the same size as my bag pieces, with the exception of the strap: I cut the strap interfacing a half inch narrower than my strap piece (in this case 2″), then fuse it to the center of the fabric, leaving a 1/4 inch on either side to reduce bulk on the seam allowance side. If this seems too fussy to you, by all means interface the entire strap. You do not need to interface the zipper end tabs.
Let’s get sewing!
 Prep your zipper: take your little tab rectangles and fold the ends in towards the center, then press in half. Slip the piece over the end of the zipper and topstitch on the zipper end to secure. Your goal is to make your zipper at least 12 inches long with the tabs.
 Make a sandwich with your front top pieces – exterior piece, zipper right side down, then lining piece. Line them up together along one edge and stitch along that edge close to the zipper. (I use my regular foot but align the needle all the way to the left, which leaves a quarter inch of zipper tape visible for more of a color contrast.)
 Turn the exterior and lining pieces up, press, and topstitch.
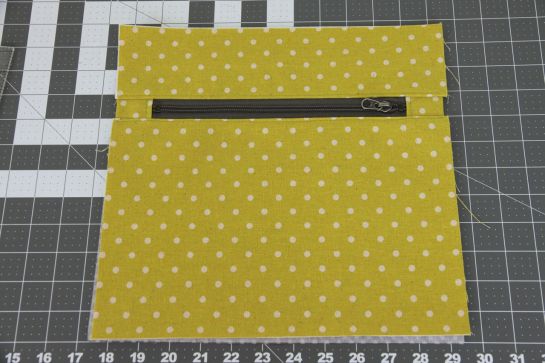
 Now repeat the sandwich with the front bottom pieces: exterior, top piece with zipper (right side facing exterior), lining piece. Line up the edges with the zipper side and stitch with the same seam allowance as you used on the top.
 Turn the exterior and lining pieces down, press, and topstitch. Your front piece is complete!
If you want an interior zipper pocket, make one now on your back lining piece. You can find a instructions for inserting an interior zipper pocket in my messenger bag tutorial, or in about a thousand other places on the internet. If you don’t want one, add a patch pocket or two, or skip the inside pockets entirely.
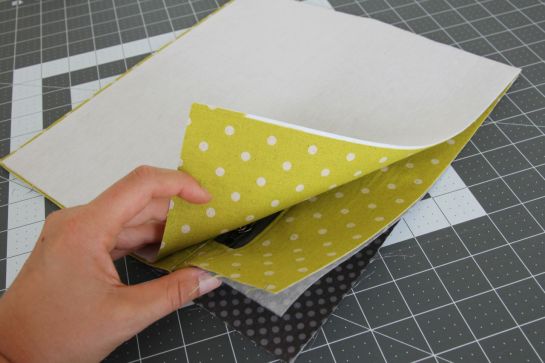
 To assemble the bag: lay your back lining piece face up, stack the front piece on top of it, lining down, then top it with your back exterior piece, face down. The lining pieces should be right sides together and the exterior pieces should be right sides together. Depending on the width of your zipper, you may have to trim the top or bottom edges of the front or back pieces to match.
 Pin your stack together just below the zipper on both sides. Open your zipper halfway to make turning out easier.
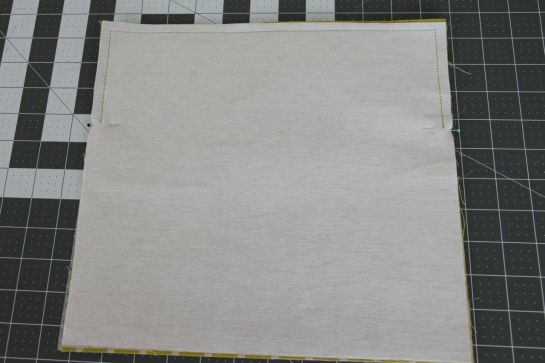
 Stitch around the top ONLY through all layers, with a 1/4 inch SA, starting at one pin and going around the top to the other pin, pivoting at the corners.
 Now separate the bottom lining from the bottom exterior, and stitch both separately. Begin stitching from as close to the end of the previous stitching (near the zipper) as possible, and using the same SA, stitch around first the exterior pieces, then around the lining, keeping the top section free and out of your way. Leave a gap in the stitching at the bottom of the lining to turn the bag right side out through.
 (Optional) Box your corners. Press the bottom half’s seam allowances open, and starting with one corner of the lining, line up the side seam with the bottom seam to make a triangle. Measure about 1 1/2 inches down from the point of the triangle along the seam line and draw a line across with a fabric pen or chalk (my line was a scant 3 inches long). Sew along the line.
 Repeat for the other lining corner and the two corners of the exterior bottom. (You can skip this step if you prefer a flat square bag.)
Now turn your bag right side out through the hole you left in the lining, poking out the corners with a chopstick or similar. Press if necessary and close up the opening in the lining by hand or machine.
 Mark where you want your grommets – mine were placed one inch in from the top and side. I always set half the grommet on the bag to make sure I like the placement, then I trace the inside of the circle so I have a guide to cut the hole.
 Follow the instructions on your grommet package to install. You’ll probably get to use a hammer!
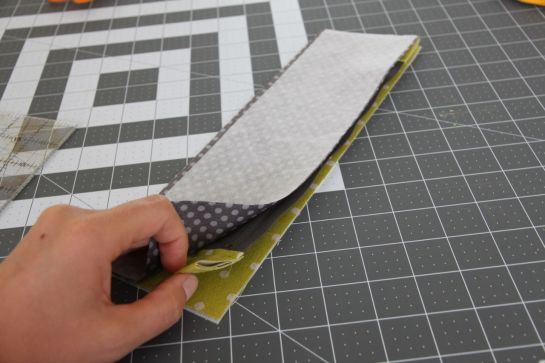
 To make the strap, fold in the seam allowances along all edges, then fold the strap in half lengthwise and topstitch along both long edges.
 Attach each end to your clips in whatever way makes the most sense. I folded the ends of my straps around the clips and stitched two lines as close to the clip as I could with a zipper foot.
 Clip your strap through the grommets and you’re good to go!
 As a side note, I generally prefer a shoulder bag to a cross body bag, so I tried to come up with a way to make my strap convertible. What I came up with finally was to clip both strap ends to one grommet, then I got a third clip to attach the middle of the strap to the other grommet for a doubled shoulder strap. But despite my clever solution, it turns out that I usually wear this bag cross body anyway.


Great tutorial, very clear. I used to make a lot of bags too, it’s a great way to use up stiff or small amounts of fabric.
Beautiful!
Adorei sua explicação, muito obrigada!
Does your main bag has a fasterner?
Could I use this pattern to make bags for selling?
Uau maravilha
Thank you for sharing this tutorial! It looks like an easy sew! Cute bag!
Pingback: Front zip cross body bag tutorial – Perfect Girl life style fashion