Messenger Bag Tutorial
Well, the gift-giving season is upon us, and my holiday present-making is beginning… a bit later than most other people’s, I imagine! So if there are any more craft procrastinators out there, here’s something for you – I thought I’d share this little messenger bag I came up with a while ago:

About a year ago, when I started riding my bike around town to dinner and pubs and whatnot, I discovered that there was a hole in my bag wardrobe, and what I really wanted was a purse-sized messenger bag. Something that would hold my wallet, phone, water bottle, and a light sweater, a bag that I could wear across my body on the bike and then the strap could be shortened up to a shoulder bag length to make it more manageable in crowded places. Of course, I wanted to make it. But when I went hunting for a tutorial online, I didn’t find exactly what I wanted. So I sat down with some graph paper and sketched out a sort of pattern/plan, and just went for it. (Click on the sketches to enlarge.)


Inspired by my Timbuk2 messenger bags (which I love, but they’re giant), I created a three-panel front with a pocket. There is also an interior zipper pocket as well as a set of patch pockets on the inside front. There is no closure on the front flap, I’ve found I haven’t needed anything and it stays closed on its own, but velcro could easily be added. Here’s a better look:


I’ve made two of these bags for myself so far (one in browns and one in greys, have to have one to match any outfit!). I wanted to make one for a friend for Christmas, so I thought I’d use the opportunity to photograph all the steps and put together a tutorial, if for no other reason than my own personal future reference. The sketched pattern is great, but I needed to document a sensible order of construction if I’m going to keep making these! I think this bag would make a great gift (obviously, since I’m giving this one to someone), or you could sew selfish and use your holiday break to make one for yourself!
I’ve used quilting cotton for all my bags (this one is fabric from the Avalon line by Jay-Cyn Designs for Birch Fabrics, aka Fabricworm (love that store!), but you could use a heavier weight canvas or something as well and not need interfacing. I think it’s a great showcase for your favorite fabric – large or small scale print (I sort of fussy cut this one to get the birds in good places), and one, two or three fabrics (the contrast pockets are fun but not at all necessary).
The finished bag measures 8 inches tall by 11 inches wide by 3 inches deep. It can probably be enlarged by adding, say, 10% to every measurement except the strap (which wouldn’t be practical any wider than 2 inches). But I like the small size – it’s a purse for your bike! Here are some pictures for scale:


The tutorial can be found after the jump. I’ve also made a pdf file of the tutorial to download (here), if you’d like to save it to your computer. Disclaimer: I am by no means a professional or even moderately skilled bag maker. I’ve made a bunch of bags from other people’s tutorials and used a lot of those techniques to construct this bag. If you’ve ever made bags before, most of the steps will be familiar to you. If you have questions or something is confusing, let me know, or check out other bag tutorials for a different look at the same step. I’ve also always thought that patterns and tutorials are springboards for customization, so make this bag your own! That is why we sew, after all, right?
Small Messenger Bag
Supplies:
- main fabric: 3/4 yard
- lining fabric: 1/3 yard (more if not using contrast for inner pockets)
- contrast fabric for inner pockets (optional): approx 1/2 yard, depending on pocket size/style
- fusible interfacing: 1 1/4 yard heavier weight for exterior and strap and 1 yard lighter weight for lining (I used Pellon Featherweight Fusible for medium and lightweight fabrics respectively, which makes a moderately floppy bag but with a fairly sturdy flap)
- two 2 inch metal loops and one 2 inch metal slide for strap (I ordered mine from here)
- one 7-9 inch zipper for interior pocket (optional)
Start by cutting out your pieces.
From the main fabric, cut:
- one 15 by 10.5 inch rectangle for the back of the bag
- two 5.5 by 10.5 inch rectangles and one 6 by 20 inch rectangle (these three narrow pieces will combine to make the three panel bag front, so make sure that if you have a directional fabric that the short sides are at the top and bottom)
- one 12 by 10 inch rectangle for the front flap (the longer side is the top/bottom)
- one 5 by 40 inch strip for the strap
- two 5 by 4 inch rectangles for the strap tabs (to attach the strap to the bag)
From the lining fabric, cut:
- two 15 by 10.5 inch rectangles for the body
- one 12 by 10 inch rectangle for the front flap
From the contrast fabric (or the lining or main fabric, if you prefer), cut:
- two 10 by 7.5 inch rectangles for the inside front pocket
- four 4 by 5 inch rectangles for the patch pockets on the inside front pocket (optional)
- one 10 by 12 inch rectangle for the interior zipper pocket (optional)
- or any interior pockets you want instead of or in addition to these
From the heavier weight interfacing, cut:
- two 15 by 10.5 inch rectangles
- one 12 by 10 inch rectangle
- one 4 by 40 inch strip (yes, it is one inch narrower than the strap piece, it’s so there’s no interfacing in the seam allowance)
- two 4 by 4 inch squares
And from the lighter weight interfacing, cut:
- two 15 by 10.5 inch rectangles
- one 12 by 10 inch rectangle
(All seam allowances are 1/2 inch)
Assemble the front panel:


Take the 6 by 20 inch piece and make a fold 8 inches from the bottom (wrong sides facing). Make a double row of topstitching along the fold. Then fold the longer, underneath piece back up so the top edge of the fabric is 2 inches above the fold, creating a pocket (which my chopstick is indicating). If you looked at the fabric from the side, it would be a sort of “z” shape. The total length of the pocket panel should now be 10.5 inches.

Lay one of the 5.5 by 10.5 inch rectangles on the pocket panel, right sides facing, and stitch one side. Press open. Repeat with the other panel piece on the other side. Topstitch along the side panels close to the pocket panel seam.
Now fuse the interfacing to the wrong side of all your pieces: back panel, your just-constructed front panel, flap and strap/tabs (centering the interfacing on the strap pieces so there’s a half inch of fabric on each side that’s not interfaced), as well as the front, back and flap of the lining.
Make the interior pockets (this is what I did, you can make any assortment of pockets you want):


Put your patch pocket pieces together right sides facing and stitch around them, leaving a gap in the bottom for turning. Clip the corners and turn right side out (poke out the corners with a chopstick or something) and press.

Place the small patch pockets on the large pocket and topstitch around the sides and bottom (closing the turning holes as well).

Then place the pocket piece on one of the lining pieces, 1 1/2 inches from the top, and topstitch around the sides and bottom as well as down the center to create two pockets.
For the internal zipper pocket (if this terrifies you, skip it, or add another patch pocket):


Measure your zipper from stop to stop. Then draw a rectangle on the back of your single pocket piece one inch from the top that is the length of your zipper + a 1/2 inch long by a 1/2 inch tall (my zipper measured 7 inches, so my rectangle was 7 1/2 inches by a 1/2 inch). Pin the pocket piece to your other lining piece 1 1/4 inches from the top.

Sew along your line through both layers, using a very short stitch around the corners. Make a slit down the middle of the rectangle, clipping in a Y shape toward the corners as close to the stitching as possible.

Turn the pocket to the inside, fanangeling it as best you can to get the pocket fabric to not show on the right side, and press.

Place the zipper behind the hole you just made, pin, and carefully topstitch all around the zipper close to the edge. Be careful not to catch the edges of the pocket fabric in the zipper stitching (ask me how I know that’s possible…)

Now flip it over and fold the pocket piece up, matching the edges, and stitch around the three sides, keeping the lining piece clear. (If you’re using a directional fabric, you may want to make the pocket with the fabric facing upside down, so when you fold it up to make the pocket the back of it is facing right side up. I obviously didn’t think of this until I had completed the pocket.)
Sew the body of the bag:

Place the two exterior panels right sides together and sew around the sides and bottom. Flatten one of the bottom corners out into a triangle, measure 1 3/4 inch down from the point and draw a line across (the line should be 3 inches long).

Sew along the line to square off the corner of the bag. Repeat for the other corner. You can trim off the triangle if you like, or leave it for extra bottom stability (which is what I do).

Turn the exterior right side out and press if necessary.
Repeat for the lining panels, but leave a 4 inch gap in stitching in the bottom for turning the bag right side out later. Leave the lining with the wrong side out.
Make the bag flap:

Stack your flap piece on your flap lining piece. Use a glass or other round object as a template to round off the bottom corners.

Place your flap pieces together right sides facing and stitch around the sides and bottom. Trim and notch corners and turn right sides out.

Press and topstitch around the three sides (I imagine your topstitching will be more even than mine!).

Baste the flap to the back of the bag body using a wide zigzag stitch, centering it between the side seams (it should be 1 1/2 inches from either seam), with right sides facing.
Make the strap:

Press the uninterfaced seam allowances on both sides of the strap and strap tabs in toward center along the edge of the interfacing. Then fold the strips in half lengthwise and topstitch along both sides. (This is my way of avoiding the dreaded long-tube-turn. You can of course fold it right sides together, stitch, turn and press before topstitching instead if you’d like.) Slide one of the metal loops onto one of the strap tabs, fold the tab in half raw edges together and baste along the raw edge. Repeat with the other tab and loop.


Thread the strap through the metal slide, fold the end over and topstitch in place. Thread one of the loop/tabs onto the strap from the other end, with the tab on the same side of the strap as the folded over end.

Now take the still-loose end and thread it through the slide, so the tab is on the outside of the loop made by the strap.

Flatten out the strap and sew the second loop/tab to the free end, folding under the raw edges and topstitching as before. I did three lines of stitching, one close to the loop and two at the folded under raw edge, but a box with an x in it also works. Do whatever you like and seems sturdy.

Baste the strap tabs to the sides of the bag, right sides facing and centered over the side seams.

Now place the whole bag exterior inside the bag lining. Tuck the strap and the flap down inside. Line up the side seams and the raw edges and pin.

Stitch all the way around the top of the bag.

Now pull the bag right side out through the hole you left in the lining. Press as best you can, and tuck the lining inside the bag.

Topstitch all around the top of the bag.

Slipstitch the hole in the lining closed, and you’re finished! Enjoy your messenger bag!

This is so lovely! Thanks so much for the tutorial – I have a gf who rides her bike everywhere and was struggling as to what to make her for Christmas… problem solved thanks to you!
And there are so many cute bike fabrics out there too, for the real bike lover 🙂 If you make one, be sure to post a picture, I’d love to see it!
Lovely bag and a great tutorial! Love it! I agree that a purse size messenger bag is fantastic. I have one from LL Bean that I love but would really like a dressier version. I guess I will make one!! 🙂
Oooh, yeah, a dressy version would be fun. I’ve been thinking of one in some kind of tweedy fabric, or a wool plaid or something!
I love it. Thank you for sharing this tutorial!
Thank you so much, I have wanted to make a bag with a flap like this but I am too lazy to be bothered thinking how!!! It is lovely!! I think I shall have a squarer one.
What a great tutorial! I love this bag anfd that you listed where to get the same fabric- too cute!!!
Pingback: Simplicity 2758: extremely delayed fall sewing « no time to sew
Pingback: Once more into the (planning) breach « no time to sew
I just finished making the bag for my sister for her birthday. It turned out fantastic and was lots of fun to make! I ordered extra metal loops and slides to make more bags.
Thanks so much for the wonderful tutorial, you didn’t leave out a thing. The step by step photos were spot on. Just when I thought I had no idea what you were talking about on the strap (placement of the loops and slides) I just looked at the photos, then read the instructions again and it all fell right into place.
You really should charge for this, it’s a keeper!
Thanks so much, I’m so glad it all made sense! Hope your sister likes her new bag!
Thank you so much for the tutorial. I just finished my bag and I love it. Will make more in different fabrics after I use this one for a while to see what I might want to change for the inside pockets 🙂
I am now the owner of the bag pictured. I love it, it is perfect, and I am utterly deflated because I know I’ll never be able to make something as perfect ever. YAY! Amazing bag! Perfect! Thank you Aleah!!!!!
WOO!
KB
Thank you so much for this tutorial! Now have to go raid my stash and get started on it!!
I sew messenger bags, and like you, pulled from a variety of books and tutorials to create my own. This tutorial is really excellent. I read through it and think it is very well done.
I haven’t sewn a messenger for my Etsy shop in quite a while because I seem to have a short attention span lately..but I am inspired to get focused enough to sew a messenger bag again!
(Don’t worry–not copying yours to sew for my shop!)
I have no place to get the buckles and such so I have to order that sort of thing and WAIT …But I do intend to make this bag, Would be great if I won the same fabric to make it too lol
Pingback: Tutorial love « no time to sew
This is beautiful, thanks for sharing your method!!
great tutorial! And what a great fabric combo! Thanks!
Pingback: Sewing to knit « no time to sew
Thank you so much for this tutorial. I have been sick for a week and just today felt well enough to be up and doing something, although not so strenuous. I have lots of felted wool sweaters laying around and so I decided to make up a bag with them. I LOVE how it came out. Would love to send you a picture of it if I knew your email – I’m not a blogger. I plan to use it for my Bible bag. I SO impressed myself by installing a zippered pocket along with the patch pockets and also made a slot to hold a few pens and added a magnetic closure. I used a belt for the shoulder strap. All parts of it were repurposed from thrift stores. Thanks again for a wonderful tutorial. I haven’t sewn for years and it was easy to follow.
I’m so glad you liked it and it worked for you! I love the idea of a felt version, especially re-purposed felt. I’m sure it’s gorgeous!
Pingback: messenger bag m0007 | handbags
I really like the fabrics you’ve used, and fab tutorial!
Pingback: At long last, it’s a Minoru! « no time to sew
I want to thank you for this tutorial. I am not sewing savvy but my mother is and she helped me make it. It was so easy that I think I’m gonna try to make her one now that I have seen the whole process through. I used upholstery fabric and it turned out fabulous.
This is a great tutorial. So glad I found you on Pinterest because I am having a hard time finding a messenger bag worthy of my money.
Love this and wish I had the patience, skills, and time to make it! Any chance you are selling them?
Uufortunately I’m not selling them (I barely have time to sew for myself right now!) If that ever changes I’ll absolutely let everyone know 🙂
In the meantime, give it a try! You’d be amazed at what you can make, I’m sure!
Sorry if this has already been said and shot down, but have you/would you consider doing a video? I suck at directions before I just like to jump right in!
Also, what kind of fabric would you recommend?
I just made this for my granddaughter. I had a test of an embroidery design that was just too cute to leave in a binder. I used the embroidery design on the front flap with borders around the design. She loves the bag, and now her mommy wants me to share the love and make one for her, too. This design has just the right features and the right size. Your instructions were easy to follow. So glad I found your blog.
This is an AWESOME bag and such a detailed, easy to follow tutorial!!! I love the shape, the fabric, all the pockets. Thanks for linking up @Threading My Way…
I just finished my second of this perfect perfect bag! Thank you so much for the tutorial. Your instructions were spot on, and they turned out to quite possibly be the nicest things I’ve ever made. I made the first one exactly to your specifications, using outdoor upholstery fabric for the outside and flap, and cloth napkins I found on clearance at Target for the lining and pockets. It’s SO cute! But I found it to be a bit too small for my needs, so I set out to make a bigger one. After struggling to find fabric that I really love (I’ve a shortage of good fabric stores in my neighborhood), I stumbled upon a beautiful table runner at Target (notice a pattern?). The ends were beautifull embroidered with a great pattern, and it turned out to be the perfect width for the flap on my bigger bag. I adjusted the measurements accordingly, found some more napkins (that matched perfectly, of course), and went to town. It turned out even more beautiful than I could’ve imagined (and I was able to leave out several steps, because the table runner was already lined with nice stiff interfacing, and the edges were finished for me. Here is a link to photos of both bags. https://www.facebook.com/media/set/?set=a.4227982500431.2177084.1311376932&type=3&l=166170d84f
Thanks again for this perfect tutorial. I cannot wait to make more!
I’m just trying this bag out three years after you, and I LOVE the idea for the back pocket! Thanks for sharing!
Hi Aleah, I’ve featured your messenger bag today…
http://threadingmyway.blogspot.com/2012/07/threading-your-way-features_20.html
Thank you sooo much for this tute! I have been on the warpath for a small purse size messenger bag that suited all my criteria. I am making one from some awesome Star Wars fabric from Fabricworm. I actually live 30 miles from their retail location and they have so much more there than they do online! Even if I go there just to browse I leave with a min. of $50 goodies everytime!
I’m going to start with the tutorial as is for my first bag. But I thought I’d try a larger version for work as well. LOVE this bag an the tutorial is so easy to follow – thanks so much!! 🙂
hi, i love you bag tutorial its exactly what i have been looking for!! i just had one question, if anyone know please let me know, when you get the bag exterior and lining ready to put together, and you put the exterior bag into the lining to get ready to sew around the top, how do you know which way it needs to face so that your pockets on the inside are on the front and the zipper is to the back of the inside? or which way do you line it up exactly so there matched up right, do you put the outside front pocket to the inside pockets or towards the zipper so when you flip it inside out the pockets are where they need to be or does it matter??? Please let me know i cant wait to make one, your tutorial is the easiest one i have found to make a cross body bag and that is decent size to fit magazine in yet small enough for a purse unlike all the huge cross body bags out there!!
haha i figured it out took my brain a minute to see how it was done, but thanks again anyway, im a camo nut so i can wait to make one of these in my camo farbric, yeah!!!
Glad you got it – yep, inside pockets facing outside pockets makes the zipper be on the body side of the bag (how I like it also). I always have a hard time wrapping my head around how inside-out things will be when they get right-side-outed too!
Pingback: bagwithlove » Blog Archive » Messenger Bag
Pingback: The Yellow Pants! Mini Wardrobe Part III: Simplicity 2443 « no time to sew
Thank you for developing this pattern and sharing it on Word Press. It is an excellent pattern and pictures are very helpful. The bag is easy to make/ Phyllis/10/18/12
Great tutorial.. ! Nice pattern.
I have been looking for a messenger bag pattern for months now & found yours. It is exactly what I’m looking for except I would like to add insulated pockets to the outside ends for water bottles. I am a beginner, so I’m not quite sure where to add them at. Any help will be greatly appreciated! Thank you!
Thank you for your tutorial, I’ve never made a bag before but you made it so easy to follow! I made this bag for my little nephew and he takes it everywhere : ) http://www.flickr.com/photos/sewumm/6729995139/in/set-72157629409709946
Awesome tutorial
Like all the others I would like to thank you for this excellent tutorial. I have been wanting to make a messenger bag for ages but never really had the courage. Now after reading your tutorial I realize I can manage! Your tutorial is so very good and has such good photos which I really understand that I know I will start on a bag in the new year. Thank you so very much for sharing I am really happy to have found you! Greetings from Germany
I had your bag pinned for a long time. Finally, last weekend I found time and an excuse to sew it.
If you want to take a look http://www.flickr.com/photos/75890037@N05/8361144671/in/photostream
thanks for your tutorial, it was very helful
Regards from Spain!
I’m excited to start this bag tomorrow, but I have a few questions: I ended up getting heavyweight interfacing at the fabric store, but reading through the directions I’m wondering if it’s too heavyweight to pull inside out after you sew along the top of the bag. Was this a problem for you? Do I need to use lightweight interfacing? How big and where on the bag do you leave the hole to pull it all through, I’m too new of a sewer to trust myself to figure it out. 😉
Thanks for posting this pattern, I’m very excited to try it out.
Well, as long as you didn’t get the super-stiff Peltex stuff, you should be okay. Can you smush the interfacing without too much resistance? Even if it’s pretty stiff, just leave a bigger hole in the lining (I leave my hole in the bottom seam of the bag lining). You could leave as big as a 6 inch hole, and that should be plenty big to pull it through, it just means more handstitching later to close it up 🙂
I just finished a bag from your design, and it turned out wonderfully! I’ve been sewing bags for a while, but rarely do I attempt something quite so complex, so your tutorial was indispensible.
I made my bag a touch bigger, as I plan to use it as a diaper bag, and it really turned out well following your directions. So yet again, thank you! Awesome tutorial!
I’m just about to start making this bag; I’m super excited. One question — did you pre-wash your fabric? I have 100% cotton quilting fabric. What do you think?
You know, I didn’t prewash, but then I don’t plan on washing my bags either. If you want a washable bag, you should wash your fabric first, since it’s likely to shrink.
Good luck and let me know how it turns out!
Thanks for responding! I am still working on the bag; I did decide to pre-wash– I have little kids and can just see having it washable as a good thing. 🙂
I’ll post pics when it’s done!
Thanks for the great tutorial! I made myself a bag today and I love it, and I also feel more able to design my own. Thank you, thank you, thank you!
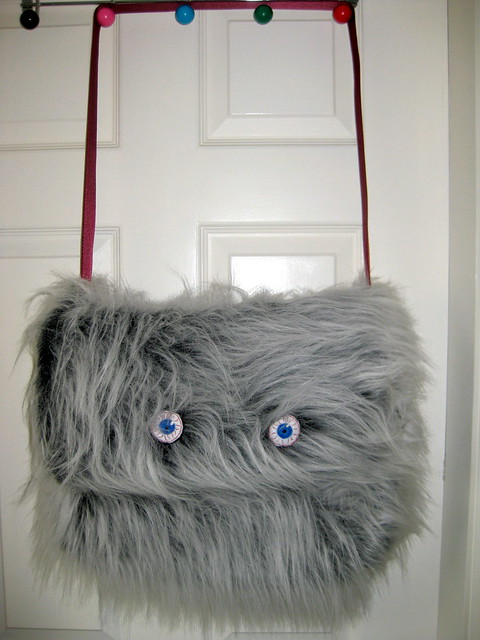
This is such a great tutorial to refer back to. I just used it to make another bag – this time with fake fur and monster eyes!
Thank you!
I just finished making the bag and would love to send you a picture…
Loved this tutorial! Thanks so much for posting. I found this on Pinterest and decided it was perfect for the project I was envisioning. I finished just last night! Check it out here: http://toocutesewclever.blogspot.com/2013/03/scrappy-messenger-bag.html
Thanks again!
Thank you and thank you. I love your tutorial! You are so talented. Made tons of mistakes but I believe the second one would be better.
Hello,
This is so cute. Do you sell them?
I love it but can not sew for anything in the world.
Thank you,
Lisa
Thanks! I don’t currently sell the bags (I barely have time to sew for myself!), but if I do start making them to sell I’ll for sure post it here!
Just made one of these, turned out great! Thanks for the awesome tutorial!
For other newbie sewers: Bear in mind that if you use a very thick fabric (I made my exterior out of canvas) you’ll lose some length on folds. When you cut that 6×20 piece for the front center panel make sure to add 1-2 inches to the length, then cut it to perfect size after you press all the folds. Mine wound up a full inch too short and I had to start over. Your strap will shrink a little too; it was plenty long enough for me, but you might want to add a few inches there too, if you’re worried about it.
Great tips about thick fabric – thanks! Glad you like the tutorial!
Thank you for a great tutorial!
Pingback: para mi lap | SUPERAD, Miles de imagenes para Postear
Pingback: Seeing shorts, with spots – return of the Thurlow | no time to sew
Greetings! This is my first visit to your blog! We are a group of volunteers
and starting a new initiative in a community in the same niche.
Your blog provided us useful information to work on.
You have done a outstanding job!
Pingback: Friday Finds – a list of 23 free tutorials and patterns to make Messenger Bags | a little bird made me
Just finished one! Used some old bistro aprons from an old job for the exterior and some bright colors for the inside. I love it! Thank you for posting!
this is the best tutorial I have seen sofar…fab! and it is my project for the day…can’t wait to go fabric shopping for this beauty!
Hi Aleah – have been trolling the internet for months looking for a simple but veratile messenger bag. This looks great – almost bought a Timbuk2 bag when I was in Toronto a couple of weeks ago. Glad I saved my money! Thanks
I am working on this bag, and have never done zippers before. I am a little confused about the zipper pocket. I pin and stitch it to the right side of the liner fabric? How do I get the pocket to the back of the liner fabric then? There will be pocket fabric on the right side of the liner then, no? Am I making any sense? lol
Sara
So you sew the pocket to the right side of the lining, then you cut a slit through both layers inside the rectangle of stitching you just made and pull the pocket through to the wrong side of the lining. Scary, I know, but that’s what you have to do! If it’s still confusing, there are lots of other great zipper pocket tutorials out there that might phrase things a little differently and have different pictures – google “inside zipper pocket” and see what comes up! Good luck!
I remember the first time I did a pocket of this type I did not understand either! With the pocket right side to the bag, you stitch a rectangle, which will become the “window” the zipper front peeks through. After stitching that rectangle, you carefully cut a line down the center the length ALMOST of the rectangle (you need to angle up from the slit to each corner, so don’t cut the line the whole length of the rectangle)..then the pocket fabric can be pushed through that slit. Do Google it though so you can see it before doing it!
Pingback: Friday finds – a list of gifts to make for a 7 year old boy (with links to free tutorials) | a little bird made me
Pingback: It’s aliiiiiiiiiiiiiiiiive!!!!! | no time to sew
Just finished my bag, love it going to make another.
lovely lovely lovely my next project
Pingback: Tsuru messenger bag | Liz: Distracted
Pingback: Crazy for Sewing | HideAway Farm
Super, merci, dommage pour moi que les explications ne soient pas en francais…..
Pingback: Messenger Bag @Love-To-Sew.com
Pingback: Messenger bag for Spring | Thread, Meet Needle
Just finished this. It’s a fantastic bag, and this tutorial is top notch!
Pingback: Messenger Bag for Spring | Christine Doyle
Such a fantastic tutorial! Not only was this the cutest bag design I could find online, but it was also one of the very few free ones and certainly had the easiest-to-follow instructions. I increased all the measurements (except the strap and tabs) by 50% and added some extra inside pockets, and I ended up with a great airplane carry-on bag! Thank you SO much. I am new to sewing and this was exactly what I needed to get me excited about it 🙂
I’m glad it worked well for you! Have fun starting your sewing adventures – I’ll warn you now, it’s just a short hop from making bags to making clothes (I speak from experience…)
Thanks! I found two matching large of home decor weight and this is the perfect project
Thank you so much! I made it and it turned out great. I swapped Peltex for the exterior interfacing, which made it stiffer. I also used Peltex for the strap as I am rather hard on them. 🙂 You did a great job making the pattern!!
About to make the bag for my 9-year old daughter (from some thrift store turquoise suede), but I keep getting distracted by the dress you’re wearing in the photos! Did you make it? Have a blog post about it? Thanks!
Ha, actually I didn’t make it, it’s one of the few RTW dresses I still wear because I love it! It was from Old Navy several years ago. I did try to knock it off a while ago: https://notimetosew.wordpress.com/2012/01/22/wool-jersey-dress-duo-mccalls-5468-and-vogue-1224/
Pingback: A Messenger Bag | All my crafty outlets ...
Hi! I’m in the middle of making this amazing bag and I’m a bit stuck on the interior zip pocket. How do I get the pocket piece to fit through that little rectangle so it can go to the back of the lining? That might not make sense….well if you can explain it a bit clearer, I’d be really grateful! I’m only 13 and often find tutorials a bit confusing!
I thought I might as well tell you about my bag! I’m combining three tutorials you see! I’m actually using a different tutorial for the actual bag. I’ve used another tutorial to add a big bow at the front for decoration, and I’m using your tutorial to make interior pockets. In the end, I’m hoping for a cross-body hipster, that’s kept closed by a zip (so no flap). I was going to follow your tutorial completely, but I find lots of top-stitching a bit daunting! Otherwise, I think it’s a great tutorial, with clever ideas, for an incredibly useful bag!
oh yeah, I forgot to mention. I’ve not started sewing the zip pocket yet, I’ve not even cut out the pocket piece. I will once I get your reply. Thanks
Zip pockets are the most complicated pockets! It’s one of those sewing things that will make sense once you start, but it’s hard to visualize before you try it. Once you sew the rectangle that will be the window for the zipper, you slice a line through the middle of the rectangle, through both pieces of fabric, clipping into the corners (making little sideways “Y”s), then you push your pocket lining piece through that hole you cut. I think it’ll make sense once you start, but if you’re still confused, check out other tutorials for more pictures (there’s lots of others out there).
Your bag sounds cool, good luck!
(PS, I find topstitching daunting too.)
Thank you for this pattern and tutorial. I made the bags today for my granddaughters (9 years and 11 years)for Christmas. They both have iPads that will fit perfectly in these messenger bags.
so fantastic! Thank you for sharing all your hard work, pinning this for future reference 🙂
LOVE this bag! I made one a couple months ago. This is by far the most advanced project I’ve done (baby steps) and it turned out fantastic! The tutorial is amazing. Much better than many you find out there. Many, many thanks for sharing this fabulous pattern.
I’m looking to order the hardware from the link that you provided but I have 2 questions…did you use the rounded metal loops or not? And did you use the cast flat, flat or rounded metal slides? Thanks. Can’t wait to do this one for my daughter. I’m also going to try to increase the size a bit.
Hmmm, it’s been a while since I’ve ordered from them, maybe the selections have changed? I think I used rounded everything. But just get what seems right to you and is the look you want!
Thanks so much for this design and well written tutorial. I added an inch to the bag body measurements and added about 18 more inches to the strap length for a better cross-body fit. My hardware came from strapworks.com
Are you metal loops and slides the flat or rounded? Trying to order now but can’t quite tell which ones to get. Thanks!
The ones I used are rounded, but get whichever kind you prefer, it doesn’t matter!
Someone may have asked this, but is it ok to sell bags made using this tutorial on an Etsy shop as long as you get credit for design? Thanks
Yes, you can sell bags you make from this tutorial, provided you give credit and with the understanding that I could retract permission if I ever decide to make and sell them myself. Good luck!
Pingback: La besace en voyage | Line et les perles : le blog
Pingback: Messenger bag | Dit's sewing corner
Pingback: 45 (plus some) awesome bag tutorials revisited
Pingback: Front zip cross body bag tutorial | no time to sew
Pingback: Make-A-List Monday 12-28-15 | Living in Color
I would like to do a tutorial video with this bag postman because I have trouble sewing.
Pingback: 10+ First Rate Father's Day Gifts to Sew - Sew What, Alicia?
Pingback: Jazzed from making my new Messenger bag/ purse | sewknitsite
Pingback: 21 of the Best Free Messenger Bag Patterns & Tutorials – Linda Matthews: Digital Textile Art & Design
So you just use regular quilters cotton with the interfacing for the outside Or a thicker canvas? Hoping to get started on a bag soon!!!
You can use either quilting cotton or canvas, I’ve done both. Choose a heavier interfacing for the light cotton, or if you use heavy canvas you could get away with no interfacing. My favorite actually is a light canvas (like the Japanese Echino fabrics) interfaced with a mid-weight fusible.
Hi nice work its the first time I see ur blog good jop thanxs.. I love what u do very much and I began to sew few things for me ..I like to do this bag but I cant imagine the last stip where the outer flip be sewen ..can u explain for me please 😬 thank u
Pingback: Messenger Bag – Color Life
Hello, hello!! I absolutely love this pattern. I have made the bag several times for gifts and with modifications of my own (added iPad Mini padded pocket, key ring loop, divider on the inside, etc.) It is one of my favorite patterns evah! The only issue I have run into (probably just because I’m hard on bags) is that this one gets floppy/loses shape really quickly. Have you tried making this with Soft&Stable or Pellon Flex Foam for a little more stability?
I just made this bag and it is lovely! Your tutorial was super easy to follow, thanks for making it!
I have made this bag one time before, but it was a while ago now and i’m having trouble figuring out the last couple of steps. I have my tabs and flap basted on. I have my main bag right side out, and i believe the directions are telling me to put it inside the wrong-side out lining and tuck in the straps and flap, but i pinned everything and they are now stuck between the two layers when it’s flipped and pulled through the hole. i’m not sure where things are going wrong. Any tips would be appreciated.
Hello! I know this isn’t my tute, but seeing as you have not yet gotten an answer, maybe I can help? Your flap/strap should be basted to the RIGHT SIDE of your outside shell. Leave your outside shell RIGHT SIDE out. Your inside shell/lining should be WRONG SIDE out. Put your outside shell into your inside shell/lining. Make sure all your flaps/straps are down in there, sandwiched between the the outside and inside shells. There should be nothing hanging out and your shells should be RIGHT SIDES together, WRONG SIDES out. Sew around the top edge. When you flip, it should all come through properly.
This is a great tutorial and the bag looks great. Just what I have been looking for – a smaller-size messenger bag. I love the inside pockets. The material I’m going to make this from does not really need a lining but this just gave me the idea to put one in anyway. The pockets will come in very handy and a contrasting fabric on the inside will look very nice. Thanks so much for taking the time to document all the steps to make this bag!
So happy to find your tutorial. Thanks so much for sharing.
Just wanted to say thank you for posting such a great pattern with such clear instructions. Really pleased with how mine has turned out. Will definitely make more!
Fabulous pattern, instructions easy even for a semi novice like me. I’ll be making more of these! Thank you so much for sharing it!!
Was looking for the pattern and didn’t find it, is there an item number that I can search on Craftsy?
If I wanted to install a magnetic snap on the center of the flap before I sew everything together, where would I put them?
LJ041648656US localization?
Wow!! Brilliant tutorial.. Love it.
omg i just found this and I am going to make it. thank you for your generosity for posting pics and instructions for newbie sewers that NEED good tutorials!!
I’ve made two of these so far. One for my daughter & one for my Mom. I have looked at other similar patterns & this one was the best for me. Thank you!!!
This is exactly what I was looking for! This style is simple and perfect for mt everyday commute. Thanks for posting this! Do you have a recommendation for asking t waterproof? I live in Seattle.
what are the finished dimensions of the bag. maybe they are there and ive missed them. thanks. its so cute.
Pingback: Messenger Bag Free Sewing Pattern
Pingback: Ram test 1 | It's Sew Easy
Pingback: Free 25 Easy Messenger Bag Patterns | It's Sew Easy
Hello…!
I was looking for further info about the messenger bag, but this article helps me a lot. Thanks for sharing useful information. Also check out best bike messenger bag here
Pingback: 25+ Free Bag Sewing Patterns YOU Can Sew ⋆ Hello Sewing
I guess I’m very late to the game but I just discovered your tutorial. I’ve been making bags for a few months now and have just about exhausted the “tote bag” category. I wanted to try something different and this seemed like a perfect intro to the world of “not another tote bag”!!
Thanks so much for taking the time to put your tutorial together and keep it available for 10 years or more!!
Anyway, I just wanted to add a suggestion that comes from another bag-making tutor. You can obtain a more “professional” result by not leaving a hole for turning the bag in the lining fabric. Go ahead and close it up. Instead, make the zipper pocket (assuming you are installing it) in 2 pieces and leave the bottom of the zipper pocket open. Make sure that the zipper is unzipped before sewing the lining and the outer shell together. The hole left in the zipper pocket can now be used to turn the bag inside out and the hole in the zipper can be closed once everything else is done. This provides a “hidden” closure and a more “professional” bag.
BTW – this trick can be used on ANY BAG that has a similar zipper pocket. I almost always include one just so I can better hide the turning hole in anything I do nowadays.
Pingback: 20 Free Bag Sewing Patterns For Everyone To Try - Craftsy
Pingback: 20 Free Bag Sewing Patterns For Ladies - DIYsCraftsy
This is PERFECT!! Thank you so much for putting together a tutorial with your creative talent!! Looking forward to making one!
Pingback: 40 Ubos nga Mga Sumbanan sa Pagtahi sa Bag - lineup-mag